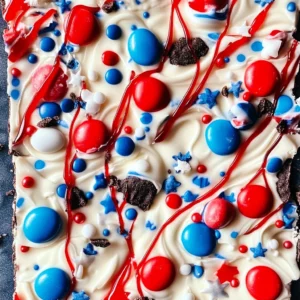
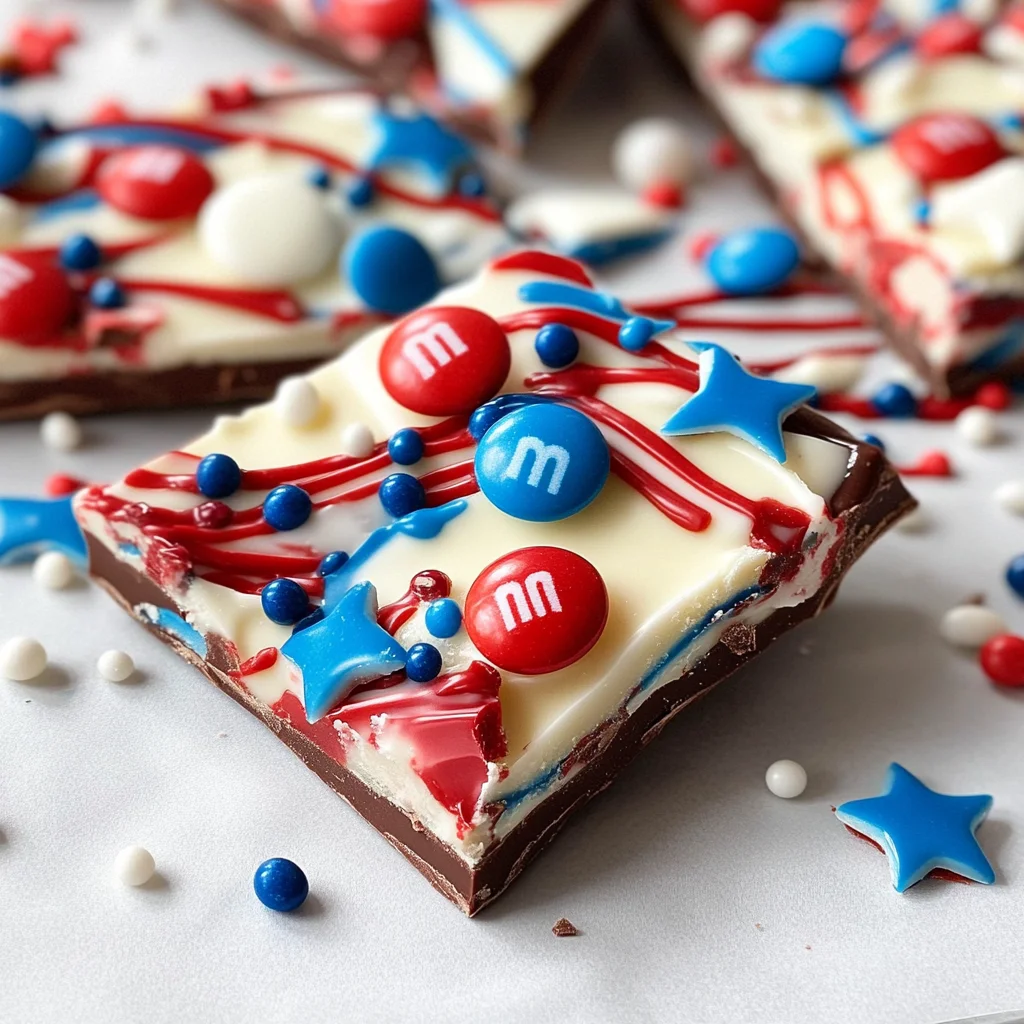
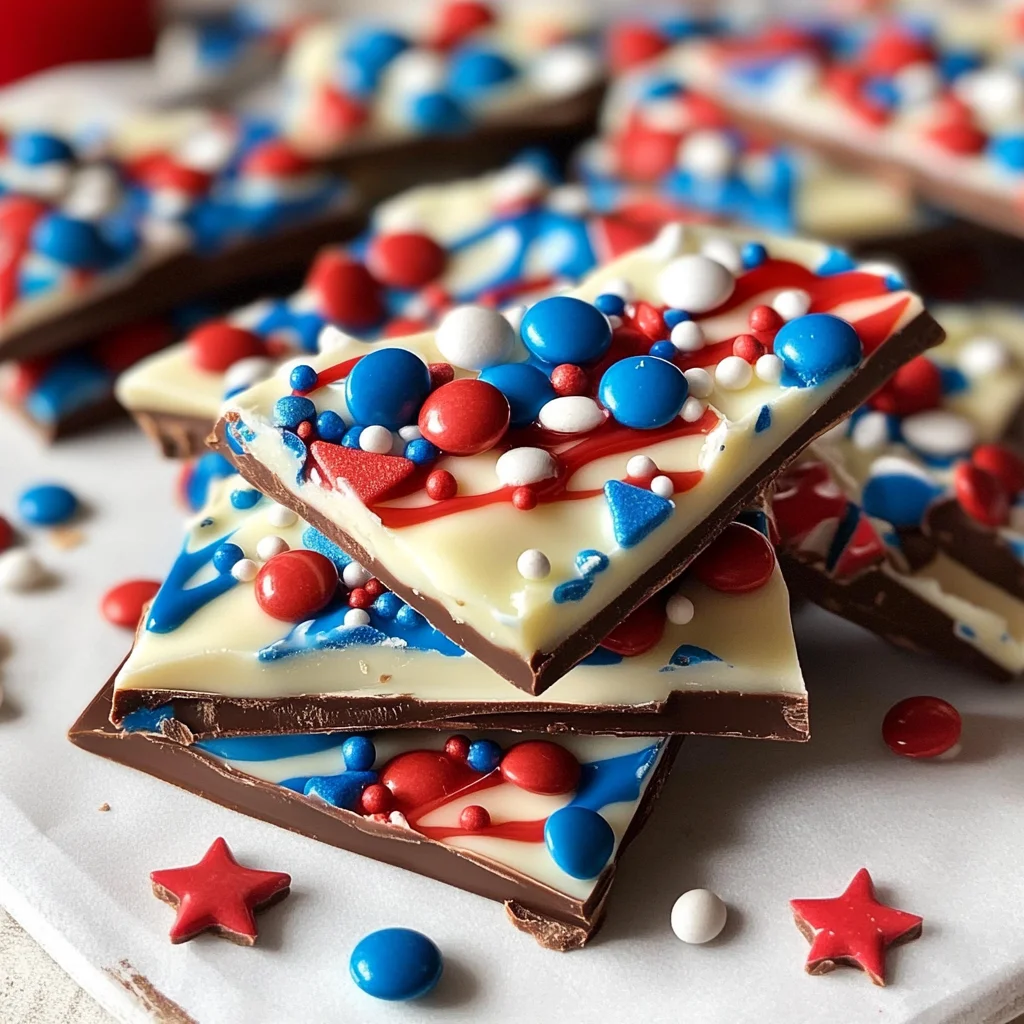
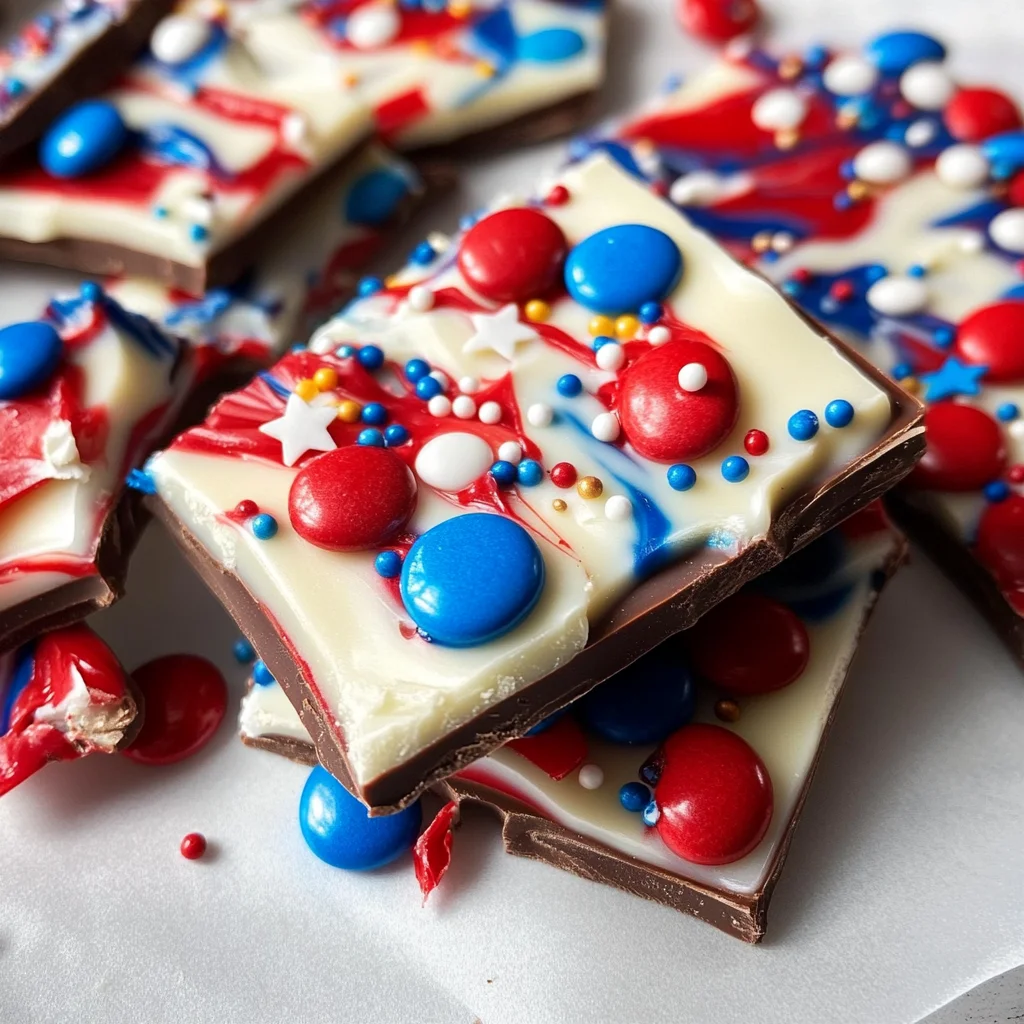
Enjoy this festive 4th of July Red, White & Blue Chocolate Bark, a vibrant dessert perfect for patriotic celebrations. This delightful treat showcases layers of smooth, melted chocolate that create a stunning centerpiece for gatherings. With its bright colors and sweet flavors, it’s suitable for various occasions, making every celebration feel special.
Jump to:
- Why You’ll Love This Recipe
- Tools and Preparation
- Essential Tools and Equipment
- Importance of Each Tool
- Ingredients
- For the Chocolate Layers
- For the Colorful Accents
- For Toppings
- How to Make 4th of July Red, White & Blue Chocolate Bark
- Step 1: Prepare Your Baking Tray
- Step 2: Melt Semi-Sweet Chocolate
- Step 3: Spread Semi-Sweet Layer
- Step 4: Melt White Chocolate
- Step 5: Melt Candy Melts
- Step 6: Create Marbled Effect
- Step 7: Add Sprinkles and M&Ms
- Step 8: Allow to Set
- Step 9: Break into Pieces
- How to Serve 4th of July Red, White & Blue Chocolate Bark
- Individual Treats
- Dessert Platter
- Ice Cream Topping
- Party Favors
- S’mores Alternative
- Chocolate Bark Cake Topper
- How to Perfect 4th of July Red, White & Blue Chocolate Bark
- Best Side Dishes for 4th of July Red, White & Blue Chocolate Bark
- Common Mistakes to Avoid
- Storage & Reheating Instructions
- Refrigerator Storage
- Freezing 4th of July Red, White & Blue Chocolate Bark
- Reheating 4th of July Red, White & Blue Chocolate Bark
- Frequently Asked Questions
- How long does it take to make 4th of July Red, White & Blue Chocolate Bark?
- Can I customize my 4th of July Red, White & Blue Chocolate Bark?
- What kind of chocolate is best for this recipe?
- Can I use other colors instead of red, white, and blue candy melts?
- Final Thoughts
- 📖 Recipe Card
Why You’ll Love This Recipe
- Easy to Make: This recipe requires minimal effort and is perfect for both novice and experienced bakers.
- Visually Stunning: The vibrant red, white, and blue colors make this bark an eye-catching dessert that impresses guests.
- Versatile Flavor Combinations: You can easily customize the toppings to suit your taste or dietary preferences.
- Fun for All Ages: Kids and adults alike will enjoy making and eating this fun chocolate bark together.
- Perfect for Celebrations: Whether it’s the 4th of July or any festive occasion, this chocolate bark adds a touch of joy to your table.
Tools and Preparation
To create your own colorful chocolate bark, you’ll need some essential tools to make the process smooth and enjoyable.
Essential Tools and Equipment
- Baking tray
- Parchment paper
- Microwave-safe bowls
- Small piping bags or spoons
- Toothpick
Importance of Each Tool
- Baking tray: Provides a sturdy base to spread the chocolate evenly.
- Parchment paper: Prevents sticking, making it easy to remove the bark once set.
- Microwave-safe bowls: Ideal for melting chocolate without burning it.
- Toothpick: Perfect for swirling colors together to create a beautiful marbled effect.
Ingredients
For the Chocolate Layers
- 2 cups white chocolate morsels
- 2 cups semi-sweet chocolate morsels
For the Colorful Accents
- 1/2 cup red candy melts
- 1/2 cup white candy melts
- 1/2 cup blue candy melts
For Toppings
- 1 tbsp red, white, and blue star sprinkles
- 1/4 cup red, white, and blue M&Ms
How to Make 4th of July Red, White & Blue Chocolate Bark
Step 1: Prepare Your Baking Tray
Line a baking tray with parchment paper to prevent sticking.
Step 2: Melt Semi-Sweet Chocolate
Begin melting the semi-sweet chocolate morsels using the microwave:
1. Place them in a microwave-safe bowl.
2. Heat in 30-second bursts, stirring between each burst until smooth.
Step 3: Spread Semi-Sweet Layer
Pour the melted semi-sweet chocolate onto the prepared tray:
– Spread it into an even layer using a spatula.
– Allow this layer to harden completely; you can speed up this process by placing the tray in the refrigerator.
Step 4: Melt White Chocolate
Melt the white chocolate morsels using the same method:
– Once melted, pour it over the hardened semi-sweet chocolate layer.
– Let this layer harden completely before proceeding.
Step 5: Melt Candy Melts
Melt the red, white, and blue candy melts separately:
– Use small piping bags or spoons to drizzle each color over the hardened white chocolate layer.
Step 6: Create Marbled Effect
Use a toothpick to gently swirl the colors:
– Do this before the candy melts harden to ensure a smooth pattern.
Step 7: Add Sprinkles and M&Ms
Sprinkle the red, white, and blue star sprinkles and M&Ms over the top:
– Ensure you do this while the candy melts are still slightly soft so they stick.
Step 8: Allow to Set
Let the entire tray harden completely:
– You can leave it at room temperature or place it in the refrigerator if you’re in a hurry.
Step 9: Break into Pieces
Once fully set:
– Lift the bark out of the tray using the edges of the parchment paper.
– Break it into pieces by hand.
Your colorful 4th of July Red, White & Blue Chocolate Bark is ready to be served! Store any leftovers in an airtight container at room temperature or in the refrigerator. Enjoy!
How to Serve 4th of July Red, White & Blue Chocolate Bark
This delightful 4th of July Red, White & Blue Chocolate Bark makes for a stunning dessert that can be enjoyed in various ways. Whether you’re hosting a picnic or attending a barbecue, these serving suggestions will help you showcase this festive treat beautifully.
Individual Treats
- Serve small pieces of chocolate bark in individual cupcake liners for easy grab-and-go portions at parties.
Dessert Platter
- Arrange broken pieces of the chocolate bark on a colorful platter alongside fresh strawberries and blueberries to enhance the patriotic theme.
Ice Cream Topping
- Crumble the bark over vanilla or strawberry ice cream for an extra special dessert that adds crunch and flavor.
Party Favors
- Package pieces of chocolate bark in clear bags tied with red, white, and blue ribbons as fun party favors for guests to take home.
S’mores Alternative
- Use pieces of the bark in place of traditional chocolate in s’mores for a festive twist when grilling outdoors.
Chocolate Bark Cake Topper
- Break the bark into larger shards and use them as a decorative topping on cakes or cupcakes for a colorful finish.
How to Perfect 4th of July Red, White & Blue Chocolate Bark
Making this chocolate bark is simple, but a few tips can elevate your results. Follow these suggestions for perfecting your 4th of July dessert.
- Choose Quality Chocolate: Use high-quality chocolate morsels for better flavor and texture. This ensures your bark melts smoothly and tastes rich.
- Proper Melting Technique: Melt chocolate in short bursts and stir frequently. This prevents burning and helps achieve a silky consistency.
- Cool Layers Completely: Allow each layer to cool completely before adding the next. This helps maintain distinct layers and prevents mixing.
- Use Piping Bags: If you want precise drizzle patterns with candy melts, using piping bags can give you more control over the design.
- Add Sprinkles Last Minute: Sprinkle toppings while the melted layers are still soft so they adhere properly without falling off once set.
- Store Correctly: Keep leftover chocolate bark in an airtight container at room temperature to maintain its crispness and freshness longer.
Best Side Dishes for 4th of July Red, White & Blue Chocolate Bark
Pairing side dishes with your festive dessert can make your celebration even more enjoyable. Here are some great options to complement your delicious chocolate bark:
- Grilled Veggie Skewers: Colorful bell peppers, zucchini, and cherry tomatoes seasoned and grilled to perfection add freshness to your menu.
- Caprese Salad: Fresh mozzarella, ripe tomatoes, and basil drizzled with balsamic glaze offer a refreshing contrast to sweet desserts.
- Corn on the Cob: Grilled or boiled corn served with butter and herbs is always a crowd favorite during summer gatherings.
- Red Potato Salad: A creamy potato salad made with red potatoes provides heartiness while keeping up with the festive color scheme.
- Watermelon Salad: Cubed watermelon tossed with mint leaves makes for a hydrating side that balances out sugary treats nicely.
- Classic Coleslaw: A crunchy coleslaw dressed lightly adds texture to the meal while being easy to prepare ahead of time.
- Fruit Platter: An assortment of seasonal fruits such as strawberries, blueberries, and pineapple is not only colorful but also refreshing alongside dessert.
- Mini Quiches: Bite-sized quiches filled with vegetables or cheese provide a savory option that complements sweet flavors beautifully.
Common Mistakes to Avoid
Make sure your chocolate bark turns out beautifully by avoiding these common mistakes.
- Not using quality chocolate: Low-quality chocolate can affect the taste and texture of your bark. Opt for good semi-sweet and white chocolate morsels for the best results.
- Skipping the cooling time: Rushing the hardening process can lead to a messy final product. Allow each layer to cool completely before adding the next to maintain distinct layers.
- Overheating the chocolate: Melting chocolate too quickly or at too high a temperature can cause it to seize. Use short bursts in the microwave and stir frequently for smooth melting.
- Ignoring decoration timing: Adding sprinkles and M&Ms too late can prevent them from sticking properly. Decorate while the top layer is still slightly soft for better adhesion.
- Using improper storage: Storing chocolate bark incorrectly can lead to it becoming stale or losing its texture. Use airtight containers to keep it fresh.
Storage & Reheating Instructions
Refrigerator Storage
- Store in an airtight container to keep it fresh.
- It will last up to one week in the refrigerator.
Freezing 4th of July Red, White & Blue Chocolate Bark
- Wrap pieces in plastic wrap or foil before placing them in an airtight container.
- The bark can be frozen for up to three months.
Reheating 4th of July Red, White & Blue Chocolate Bark
- Oven: Preheat to low heat (around 200°F) and place bark on a baking sheet until just warm.
- Microwave: Use short intervals (5-10 seconds) on low power if needed; be cautious not to melt.
- Stovetop: Place in a heatproof bowl over simmering water, stirring gently until warm.
Frequently Asked Questions
Here are some common questions about making the 4th of July Red, White & Blue Chocolate Bark.
How long does it take to make 4th of July Red, White & Blue Chocolate Bark?
The total time is about 1 hour and 42 minutes, which includes prep and cooling time.
Can I customize my 4th of July Red, White & Blue Chocolate Bark?
Absolutely! You can add different types of candies or nuts according to your preference.
What kind of chocolate is best for this recipe?
High-quality semi-sweet and white chocolate morsels work best for a rich flavor and smooth texture.
Can I use other colors instead of red, white, and blue candy melts?
Yes! Feel free to get creative with different colors for various occasions or themes.
Final Thoughts
This vibrant 4th of July Red, White & Blue Chocolate Bark is not only visually appealing but also incredibly delicious. Its layers of smooth chocolate combined with colorful decorations make it perfect for celebrations. Plus, you can easily customize it with your favorite toppings. Give this festive treat a try at your next gathering!
Did You Enjoy Making This Recipe? Please rate this recipe with ⭐⭐⭐⭐⭐ or leave a comment.
📖 Recipe Card
Print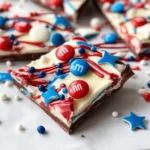
4th of July Red, White & Blue Chocolate Bark
- Total Time: 40 minutes
- Yield: Approximately 12 servings 1x
Description
Get ready to celebrate with this vibrant 4th of July Red, White & Blue Chocolate Bark! This delightful dessert combines smooth layers of semi-sweet and white chocolate, adorned with colorful candy melts and festive sprinkles to create a visually stunning treat that’s perfect for summer gatherings. Whether you’re hosting a picnic or attending a barbecue, this easy-to-make chocolate bark will impress guests of all ages. With its customizable toppings and cheerful colors, it adds a touch of joy to any celebration. Enjoy the sweet tastes of summer while creating lasting memories with friends and family.
Ingredients
- 2 cups white chocolate morsels
- 2 cups semi-sweet chocolate morsels
- 1/2 cup red candy melts
- 1/2 cup white candy melts
- 1/2 cup blue candy melts
- 1 tbsp red, white, and blue star sprinkles
- 1/4 cup red, white, and blue M&Ms
Instructions
- Line a baking tray with parchment paper.
- Melt semi-sweet chocolate in a microwave-safe bowl in 30-second bursts until smooth. Pour onto the prepared tray and spread evenly. Let harden completely.
- Melt white chocolate using the same method; pour over the hardened semi-sweet layer and let harden.
- Melt red, white, and blue candy melts separately. Drizzle each color over the hardened white chocolate layer.
- Use a toothpick to swirl the colors together before they set.
- Sprinkle star sprinkles and M&Ms on top while still soft.
- Allow to set completely at room temperature or refrigerate for faster results.
- Once set, lift from the tray using parchment paper edges and break into pieces.
- Prep Time: 20 minutes
- Cook Time: 20 minutes
- Category: Dessert
- Method: Baking
- Cuisine: American
Nutrition
- Serving Size: 1 piece (28g)
- Calories: 150
- Sugar: 12g
- Sodium: 10mg
- Fat: 8g
- Saturated Fat: 5g
- Unsaturated Fat: 3g
- Trans Fat: 0g
- Carbohydrates: 18g
- Fiber: 0g
- Protein: 1g
- Cholesterol: 0mg