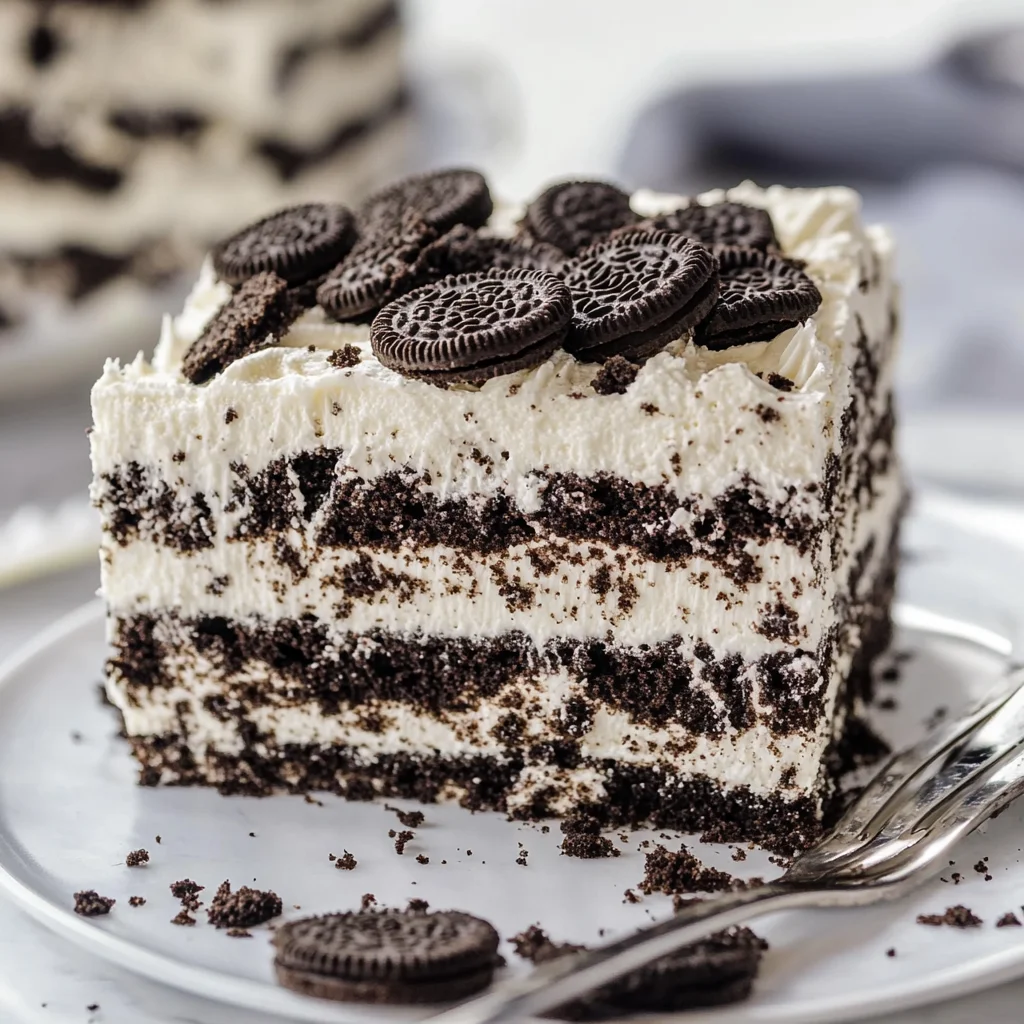
Oreo Icebox Cake is the ultimate no-bake dessert that combines creamy whipped cream and crunchy Oreo cookies for a delightful treat. This easy recipe is perfect for any occasion, whether it’s a birthday celebration, family gathering, or just a sweet craving. The best part? You can prepare it a day in advance, allowing the flavors to meld beautifully overnight. With layers of luscious cream and chocolatey goodness, this dessert will impress everyone at your table.
Jump to:
- Why You’ll Love This Recipe
- Tools and Preparation
- Essential Tools and Equipment
- Importance of Each Tool
- Ingredients
- For the Cake Layers
- For Garnish
- How to Make Oreo Icebox Cake
- Step 1: Prepare the Whipped Cream
- Step 2: Layer the Oreos
- Step 3: Add Whipped Cream
- Step 4: Repeat Layers
- Step 5: Finish with Whipped Cream
- Step 6: Chill Before Serving
- Step 7: Garnish Before Serving
- How to Serve Oreo Icebox Cake
- Classic Presentation
- Toppings Galore
- Pairing Suggestions
- Personal Touch
- How to Perfect Oreo Icebox Cake
- Best Side Dishes for Oreo Icebox Cake
- Common Mistakes to Avoid
- Storage & Reheating Instructions
- Refrigerator Storage
- Freezing Oreo Icebox Cake
- Reheating Oreo Icebox Cake
- Frequently Asked Questions
- What is an Oreo Icebox Cake?
- Can I customize my Oreo Icebox Cake?
- How long does Oreo Icebox Cake last in the fridge?
- Can I make Oreo Icebox Cake ahead of time?
- Final Thoughts
- 📖 Recipe Card
Why You’ll Love This Recipe
- Quick to Make: With just 20 minutes of prep time, you can whip up this dessert in no time.
- No Baking Required: Forget about preheating the oven; this cake sets in the fridge!
- Deliciously Decadent: The combination of Oreo cookies and fresh whipped cream is irresistible.
- Versatile Dessert: Perfect for birthdays, picnics, or simply as an everyday treat.
- Easily Customizable: You can add toppings like chocolate syrup or fresh berries for extra flair.
Tools and Preparation
Before diving into making your Oreo Icebox Cake, gather your tools. Having everything at hand makes the process smoother and quicker.
Essential Tools and Equipment
- Stand mixer or hand mixer
- Mixing bowl
- Spatula
- 8×8 baking dish or pan
- Plastic wrap or lid
Importance of Each Tool
- Stand mixer or hand mixer: These tools help achieve stiff peaks quickly when whipping cream.
- Mixing bowl: A spacious bowl allows for easy mixing without spills.
- Spatula: Perfect for spreading whipped cream evenly over the layers.
- Baking dish: An 8×8 dish fits this recipe perfectly and keeps all layers intact.
Ingredients
Oreo Icebox Cake is made with simple ingredients that come together for a delicious treat.
For the Cake Layers
- 2 cups heavy whipping cream
- 1 cup powdered sugar
- 1 tablespoon vanilla extract
- 30 whole Oreos
For Garnish
- 12 crushed/chopped Oreos
How to Make Oreo Icebox Cake
Step 1: Prepare the Whipped Cream
In a large mixing bowl with a hand mixer, or use a stand mixer with the whisk attachment, add the heavy whipping cream, powdered sugar, and vanilla extract.
- Start on low speed to prevent splattering.
- Gradually increase speed until thick peaks form. This takes about 7-8 minutes.
Step 2: Layer the Oreos
In an 8×8 baking dish, cover the bottom with a single layer of whole Oreos.
- If necessary, cut some Oreos in half to fill any gaps completely.
- Ensure that you have an even layer across the bottom.
Step 3: Add Whipped Cream
Spread half of the whipped cream mixture over the layer of Oreos.
- Use a spatula to smooth out the top evenly.
- Ensure every Oreo is covered well.
Step 4: Repeat Layers
Add another layer of Oreo cookies on top of the whipped cream.
- Place them closely together for maximum flavor in every bite.
Step 5: Finish with Whipped Cream
Spread the remaining whipped cream on top of the second layer of Oreos.
- Again, smooth out with your spatula until even.
Step 6: Chill Before Serving
Cover the pan with a lid or plastic wrap.
- Refrigerate for at least 8 hours; overnight is recommended for best results.
Step 7: Garnish Before Serving
Just before serving, sprinkle crushed Oreos on top as garnish.
- This adds extra texture and enhances presentation!
How to Serve Oreo Icebox Cake
Oreo Icebox Cake is a delightful dessert that can be served in various ways to enhance its flavor and presentation. Here are some creative serving suggestions to impress your guests.
Classic Presentation
- Serve in squares: Cut the chilled cake into neat squares for easy serving.
- Use dessert plates: Place each square on a decorative dessert plate for a professional touch.
Toppings Galore
- Whipped cream: Add a dollop of fresh whipped cream on top for an extra creamy texture.
- Fresh berries: Garnish with strawberries, raspberries, or blueberries for a fruity contrast.
Pairing Suggestions
- Vanilla ice cream: Serve alongside a scoop of vanilla ice cream to complement the chocolatey flavors.
- Chocolate sauce: Drizzle chocolate sauce over the top for added indulgence.
Personal Touch
- Mint leaves: Include fresh mint leaves as a garnish for a pop of color and freshness.
- Chocolate shavings: Sprinkle some chocolate shavings on top for an elegant finish.
How to Perfect Oreo Icebox Cake
Making the perfect Oreo Icebox Cake is all about attention to detail. Here are some tips to ensure your dessert turns out amazing every time.
- Chill thoroughly: Make sure to refrigerate the cake overnight. This helps the flavors meld together and the cookies soften perfectly.
- Use fresh ingredients: Always use fresh heavy whipping cream and quality Oreos for the best taste.
- Layer evenly: Spread whipped cream evenly between layers to ensure balanced flavor in every bite.
- Experiment with flavors: Consider adding different extracts like almond or mint to give your cake a unique twist.
- Adjust sweetness: Taste your whipped cream before layering; you can adjust the sugar based on your preference.
Best Side Dishes for Oreo Icebox Cake
Oreo Icebox Cake pairs well with several side dishes that can enhance its rich flavors. Here are some great options to consider serving alongside this delicious dessert.
- Fruit salad: A light fruit salad provides a refreshing contrast to the richness of the cake.
- Chocolate mousse: Silky chocolate mousse complements the Oreo flavors while adding an elegant touch.
- Coffee: A cup of freshly brewed coffee balances out the sweetness with its bold flavor.
- Milkshake: A classic milkshake can enhance the dessert experience, especially for kids.
- Panna cotta: Creamy panna cotta adds sophistication and pairs beautifully with chocolate desserts.
- Cheesecake bites: Mini cheesecake bites offer another creamy option that guests will love.
Common Mistakes to Avoid
Making Oreo Icebox Cake can be simple, but there are a few common mistakes that could impact your dessert’s outcome.
- Using stale cookies: Ensure your Oreos are fresh for the best flavor and texture. Stale cookies won’t soften properly, affecting the cake’s layers.
- Not whipping cream enough: Beating the heavy cream until stiff peaks form is crucial. If it’s under-whipped, the layers may not hold together well.
- Skipping refrigeration: Patience is key! Refrigerate the cake for at least 8 hours. Skipping this step will result in a runny dessert.
- Adding toppings too early: Wait to add crushed Oreos until just before serving. This keeps them crunchy and adds a delightful texture contrast.
Storage & Reheating Instructions
Refrigerator Storage
- Store in an airtight container: This prevents the cake from absorbing odors and keeps it fresh.
- Consume within 3-5 days: The flavors and textures are best during this period.
Freezing Oreo Icebox Cake
- Wrap tightly: Use plastic wrap or aluminum foil to ensure it doesn’t get freezer burn.
- Store for up to 2 months: Beyond that, the texture may change.
Reheating Oreo Icebox Cake
- Oven: Not recommended for this no-bake dessert as it alters the texture.
- Microwave: Heat in short bursts (10-15 seconds) if you prefer a softer texture but be cautious not to melt it completely.
- Stovetop: Avoid reheating on the stovetop; this dessert is best served cold.
Frequently Asked Questions
What is an Oreo Icebox Cake?
Oreo Icebox Cake is a no-bake dessert made with layers of Oreo cookies and whipped cream. It’s an easy, delicious treat perfect for any occasion.
Can I customize my Oreo Icebox Cake?
Yes! You can add different toppings like chocolate chips or fruit layers between the Oreos for added flavor and variety.
How long does Oreo Icebox Cake last in the fridge?
When stored properly in an airtight container, it lasts about 3-5 days in the refrigerator.
Can I make Oreo Icebox Cake ahead of time?
Absolutely! In fact, it’s recommended to make it a day ahead so that the flavors meld beautifully.
Final Thoughts
Oreo Icebox Cake is not only easy to prepare but also incredibly versatile. Its layers of rich flavor make it a crowd-pleaser at any gathering. Feel free to customize it with your favorite mix-ins or toppings. Try making this delightful dessert today!
Did You Enjoy Making This Recipe? Please rate this recipe with ⭐⭐⭐⭐⭐ or leave a comment.
📖 Recipe Card
Print
Oreo Icebox Cake
- Total Time: 0 hours
- Yield: Serves approximately 9 people 1x
Description
Oreo Icebox Cake is a delightful no-bake dessert that combines layers of creamy whipped cream and crunchy Oreo cookies, creating a treat that is as easy to make as it is delicious. This recipe requires minimal prep time and no baking, making it perfect for any occasion—be it birthdays, family gatherings, or a sweet indulgence at home. Simply prepare the cake the day before to allow the flavors to meld beautifully overnight. With its rich chocolatey taste and smooth texture, this dessert will surely impress your guests and leave them asking for seconds.
Ingredients
- 2 cups heavy whipping cream
- 1 cup powdered sugar
- 1 tablespoon vanilla extract
- 30 whole Oreos
- 12 crushed Oreos (for garnish)
Instructions
- In a mixing bowl, whip heavy cream, powdered sugar, and vanilla extract until stiff peaks form (about 7-8 minutes).
- In an 8×8 baking dish, layer whole Oreos on the bottom.
- Spread half of the whipped cream over the Oreos evenly.
- Add another layer of whole Oreos and top with remaining whipped cream.
- Cover and refrigerate for at least 8 hours or overnight.
- Before serving, sprinkle crushed Oreos on top for garnish.
- Prep Time: 20 minutes
- Cook Time: None
- Category: Dessert
- Method: No-bake
- Cuisine: American
Nutrition
- Serving Size: 1 square (75g)
- Calories: 250
- Sugar: 18g
- Sodium: 80mg
- Fat: 20g
- Saturated Fat: 10g
- Unsaturated Fat: 9g
- Trans Fat: 0g
- Carbohydrates: 20g
- Fiber: 1g
- Protein: 3g
- Cholesterol: 40mg