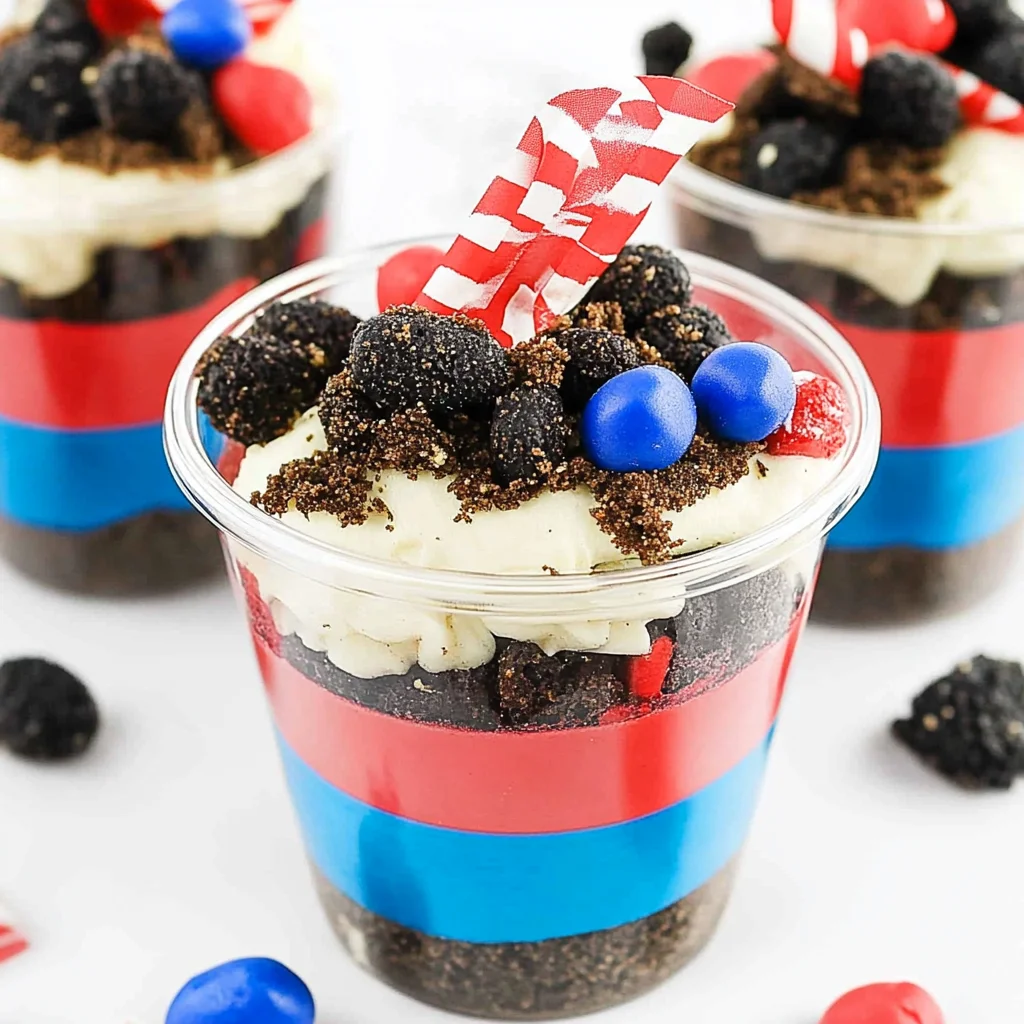
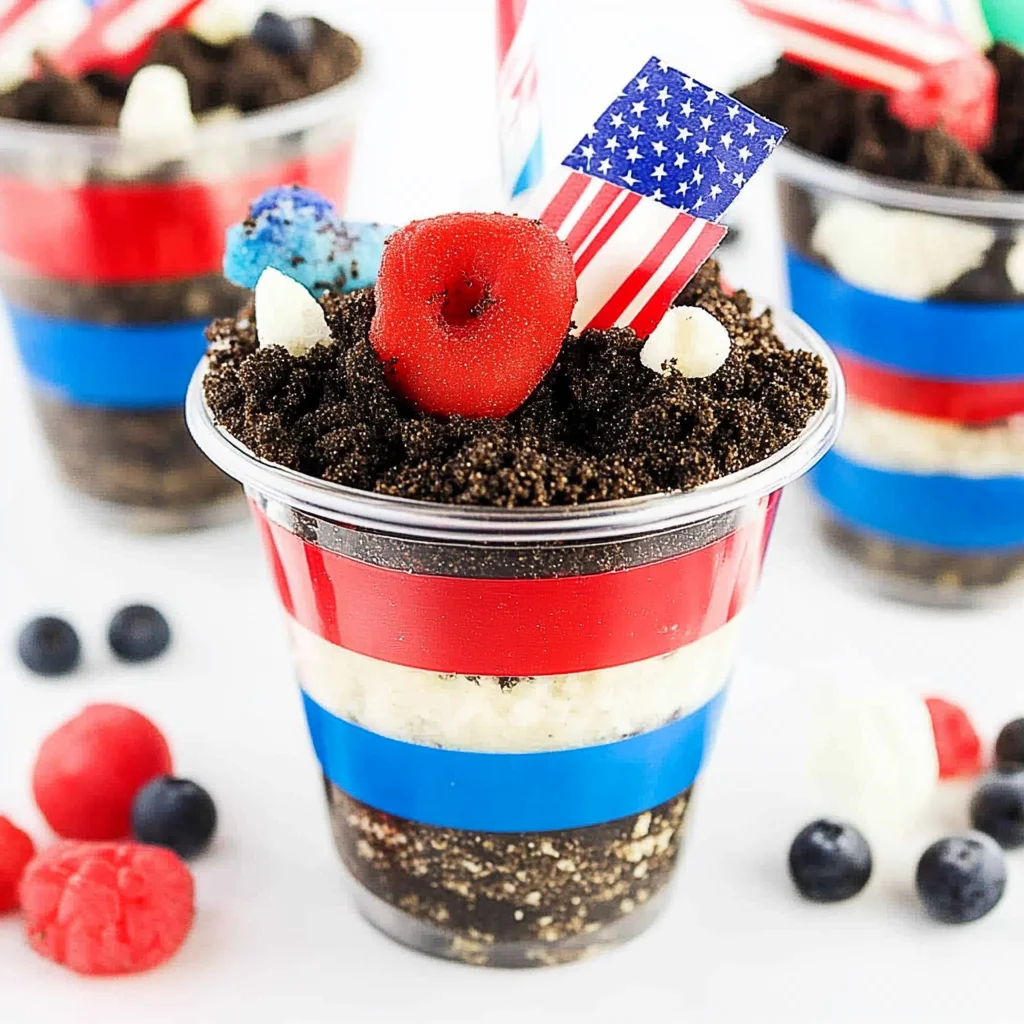
Easy no-bake Red, White and Blue Dirt Cups are a fun and festive treat perfect for summer celebrations like the 4th of July. These colorful cups combine layers of creamy pudding, crushed Oreos, and gummy worms, making them an exciting dessert for kids and adults alike. Their vibrant colors and playful presentation make them ideal for picnics, barbecues, or any patriotic gathering. Plus, they are simple to prepare and require no baking!
Jump to:
- Why You’ll Love This Recipe
- Tools and Preparation
- Essential Tools and Equipment
- Importance of Each Tool
- Ingredients
- For Garnish
- How to Make Red, White and Blue Dirt Cups
- Step 1: Prepare the Pudding
- Step 2: Color the Pudding
- Step 3: Layer Your Cups
- Step 4: Build More Layers
- Step 5: Finish with Red Pudding
- Step 6: Add Fun Toppings
- How to Serve Red, White and Blue Dirt Cups
- Individual Cups
- Family Style
- Picnic Ready
- Themed Table Setting
- Kids’ Party Favors
- Garnishing Options
- How to Perfect Red, White and Blue Dirt Cups
- Best Side Dishes for Red, White and Blue Dirt Cups
- Common Mistakes to Avoid
- Storage & Reheating Instructions
- Refrigerator Storage
- Freezing Red, White and Blue Dirt Cups
- Reheating Red, White and Blue Dirt Cups
- Frequently Asked Questions
- How long do Red, White and Blue Dirt Cups last?
- Can I customize Red, White and Blue Dirt Cups?
- Are Red, White and Blue Dirt Cups gluten-free?
- What occasions are best for serving these dessert cups?
- Final Thoughts
- 📖 Recipe Card
Why You’ll Love This Recipe
- Quick to Make: This recipe takes just 10 minutes to prepare, allowing you to whip up a delightful dessert in no time.
- No-Bake Convenience: Enjoy a delicious treat without turning on the oven—perfect for hot summer days!
- Kid-Friendly: With fun layers and gummy worms on top, kids will love helping to make and eat these dirt cups.
- Versatile Layers: You can easily customize the layers with different colors or toppings to fit any occasion.
- Impressive Presentation: The vibrant red, white, and blue layers create a visually stunning dessert that will impress your guests.
Tools and Preparation
Before diving into making your Red, White and Blue Dirt Cups, gather your tools. Having everything ready will streamline the process.
Essential Tools and Equipment
- Mixing bowl
- Whisk
- Plastic cups
- Measuring spoons
Importance of Each Tool
- Mixing bowl: A large mixing bowl is essential for combining your ingredients smoothly.
- Whisk: Using a whisk helps achieve a fluffy pudding texture that’s light and airy.
- Plastic cups: These are perfect for layering your dirt cups and showcasing the beautiful colors.
Ingredients
Here’s what you’ll need to make your very own Red, White and Blue Dirt Cups:
- 2 boxes cheesecake pudding (3.4 ounces each)
- 4 cups milk
- 19 Oreo cookies (crushed)
- ¼ teaspoon red gel food dye
- ¼ teaspoon blue gel food dye
- 8 red and blue gummy worms
For Garnish
- 2 tablespoons fresh parsley, finely chopped
How to Make Red, White and Blue Dirt Cups
Step 1: Prepare the Pudding
- Place both boxes of pudding in a large mixing bowl.
- Add the milk gradually while whisking continuously until the pudding thickens.
Step 2: Color the Pudding
- Divide the pudding into two bowls: place 1 cup in one bowl and 1 ½ cups in another.
- Add blue dye to the bowl with 1 cup of pudding; mix thoroughly until color is uniform.
- Add red dye to the bowl with 1 ½ cups of pudding; stir well until fully mixed.
Step 3: Layer Your Cups
- Line up your plastic cups for assembly.
- In each cup, start by adding 1 tablespoon of crushed Oreos at the bottom—spread evenly.
- On top of the Oreos, add 2 tablespoons of blue pudding; gently spread it out.
Step 4: Build More Layers
- Add another tablespoon of crushed Oreos on top of the blue layer—spread evenly again.
- Next, layer in 3 tablespoons of white pudding; smooth it out evenly.
- Add 1 ½ tablespoons more white pudding as another layer—spread evenly.
Step 5: Finish with Red Pudding
- Top off with 4 tablespoons of red pudding as your final layer.
- For garnish, add another 2 tablespoons of crushed Oreos on top.
Step 6: Add Fun Toppings
- Finally, place two gummy worms on each cup along with a small flag for decoration.
- Serve immediately or chill until ready to enjoy!
With these easy steps, you’ll have delicious Red, White and Blue Dirt Cups ready for any celebration!
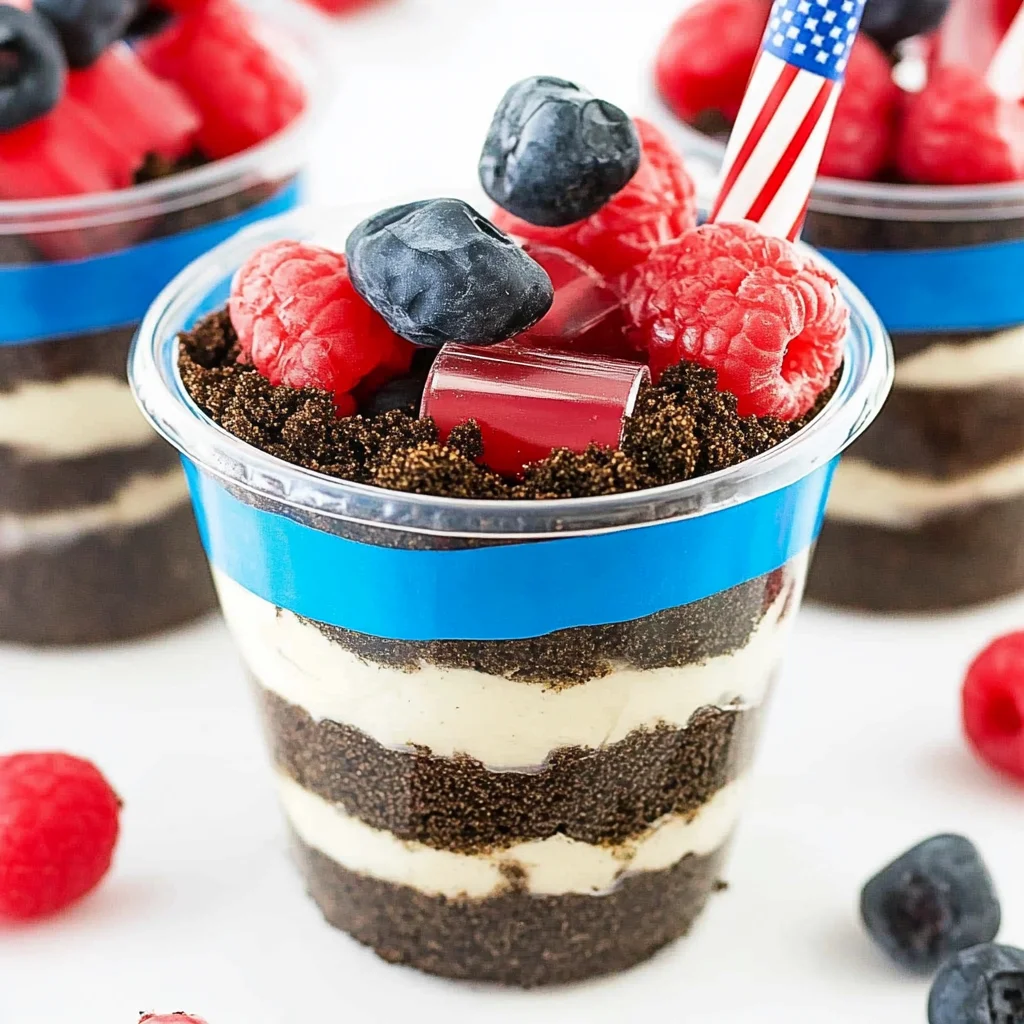
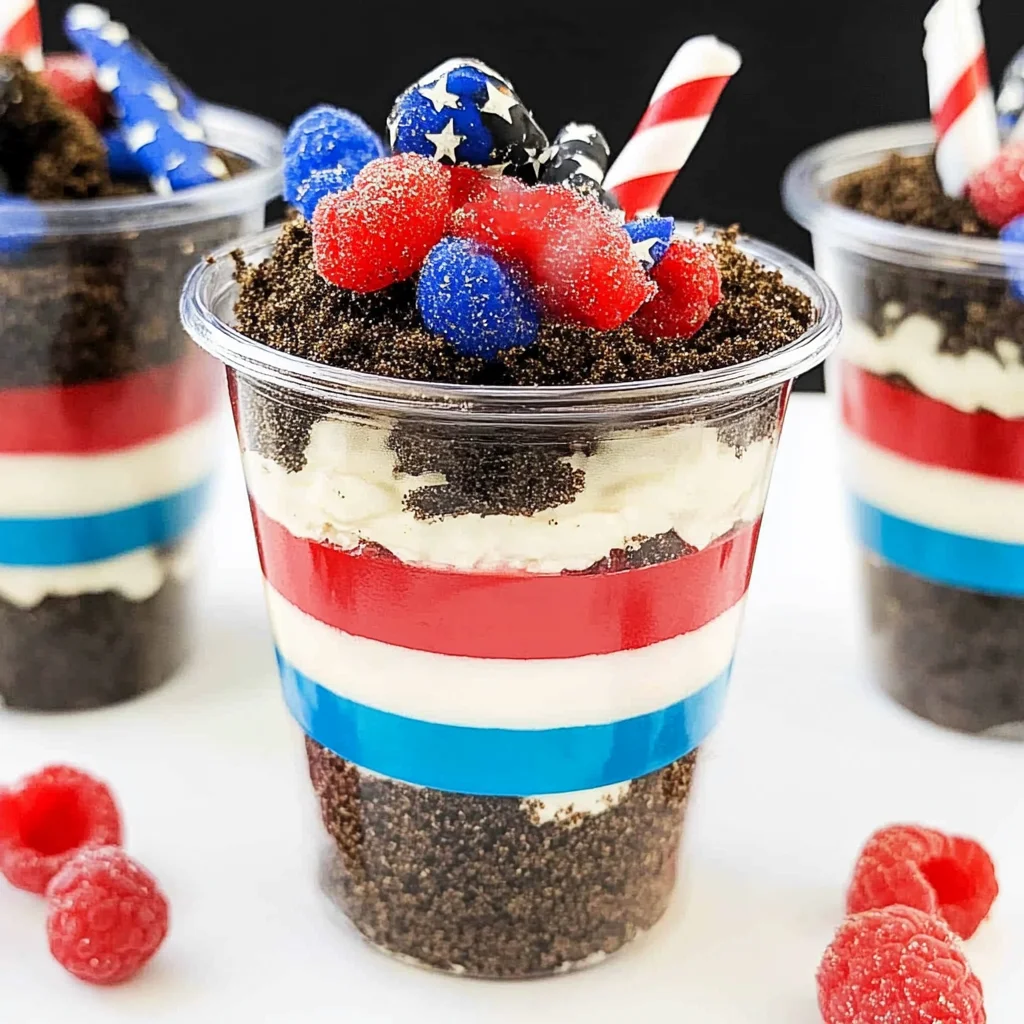
How to Serve Red, White and Blue Dirt Cups
Red, White and Blue Dirt Cups make a fun and festive dessert for any summer gathering, especially on the 4th of July. Here are some creative ways to serve them to impress your guests and add a touch of whimsy.
Individual Cups
- Serve each dessert in clear plastic cups to showcase the colorful layers. This presentation highlights the red, white, and blue theme beautifully.
Family Style
- Arrange several cups on a large platter for a family-style dessert. This allows guests to help themselves while making it easy to share.
Picnic Ready
- Pack these cups in a cooler for an outdoor picnic. They are easy to transport and make for a delightful treat under the sun.
Themed Table Setting
- Decorate your table with red, white, and blue decorations. Use themed napkins and plates that complement the color scheme of the dessert.
Kids’ Party Favors
- Offer these delicious cups as party favors at children’s birthday parties or gatherings. Tie each cup with a festive ribbon for an added touch.
Garnishing Options
- Enhance each cup with additional toppings like fresh berries or whipped cream. This adds flavor and makes the dessert even more appealing.
How to Perfect Red, White and Blue Dirt Cups
To create the perfect Red, White and Blue Dirt Cups, consider these helpful tips that will elevate your dessert game.
- Use fresh ingredients – Fresh milk and high-quality Oreo cookies will enhance the flavor of your pudding layers.
- Whisk thoroughly – Make sure you whisk the pudding until it’s fully thickened for the best texture in each cup.
- Layer carefully – Take your time when layering ingredients to maintain distinct colors and create an eye-catching presentation.
- Chill before serving – Refrigerate the cups for at least 30 minutes before serving; this helps set the layers nicely.
- Experiment with flavors – Consider trying different flavored pudding mixes like vanilla or strawberry for a unique twist on this classic recipe.
- Add festive garnishes – Top each cup with edible glitter or sprinkles for extra flair that matches your holiday theme.
Best Side Dishes for Red, White and Blue Dirt Cups
Pairing side dishes with Red, White and Blue Dirt Cups can enhance your summer celebration. Here are some great options that complement this sweet treat perfectly.
- Fruit Salad – A refreshing mix of seasonal fruits provides a healthy counterbalance to the rich dirt cups.
- Grilled Corn on the Cob – Sweet corn adds a delightful crunch that contrasts nicely with the creamy dessert.
- Potato Salad – Classic potato salad offers a hearty side dish that is always popular at summer gatherings.
- Coleslaw – A tangy coleslaw brings brightness and acidity that pairs well with sweet desserts.
- BBQ Chicken Skewers – Savory skewers add protein to your menu, making it well-rounded for guests of all ages.
- Chips and Guacamole – The creaminess of guacamole complements your dirt cups while providing a tasty snack option.
- Caprese Salad Skewers – These colorful bites feature tomatoes, mozzarella, and basil for a fresh palette-pleasing choice.
- Deviled Eggs – A classic favorite that is easy to prepare and loved by many, adding variety to your meal spread.
Common Mistakes to Avoid
When making Red, White and Blue Dirt Cups, it’s easy to make mistakes that could affect the final result. Here are some common pitfalls and how to avoid them.
- Not Whisking Enough: Failing to whisk the pudding mixture thoroughly can lead to lumps. Make sure you whisk until the pudding is smooth and fully thickened.
- Overfilling the Cups: It’s tempting to add too much of each layer, but overfilling can cause spills and messes. Stick to the recommended tablespoon measurements for each layer.
- Ignoring Layer Order: Mixing up the order of layers can impact presentation. Follow the recipe closely for a beautiful and festive look.
- Using Warm Milk: Always use cold milk for the pudding mixture. Warm milk can prevent the pudding from setting properly.
- Skipping Chilling Time: While this recipe is no-bake, letting the cups chill for a bit helps flavors meld. Allow time in the fridge before serving for best results.
Storage & Reheating Instructions
Refrigerator Storage
- Store in airtight containers for up to 3 days in the refrigerator.
- If prepared in cups, cover each cup with plastic wrap or a lid.
Freezing Red, White and Blue Dirt Cups
- These cups can be frozen for up to 1 month.
- Use freezer-safe containers or wrap individual cups tightly with aluminum foil.
Reheating Red, White and Blue Dirt Cups
- Oven: Not recommended as they are best served cold.
- Microwave: Use sparingly; if you must warm, microwave on low power for a few seconds.
- Stovetop: Not suitable; these dessert cups are designed to be enjoyed chilled.
Frequently Asked Questions
How long do Red, White and Blue Dirt Cups last?
These delicious cups will last up to 3 days in the refrigerator when stored properly.
Can I customize Red, White and Blue Dirt Cups?
Absolutely! Feel free to swap out gummy worms for other candies or add fruit layers like strawberries or blueberries for added freshness.
Are Red, White and Blue Dirt Cups gluten-free?
If you use gluten-free Oreos, then yes! Just make sure all ingredients are certified gluten-free.
What occasions are best for serving these dessert cups?
They are perfect for summer gatherings like barbecues, picnics, and especially 4th of July celebrations!
Final Thoughts
Red, White and Blue Dirt Cups offer a fun and festive treat that’s easy to make without baking. Their vibrant colors make them perfect for summer celebrations. You can customize them with different candies or toppings based on your preferences. Don’t hesitate to try this delightful recipe that’s sure to impress both kids and adults alike!
Did You Enjoy Making This Recipe? Please rate this recipe with ⭐⭐⭐⭐⭐ or leave a comment.
📖 Recipe Card
Print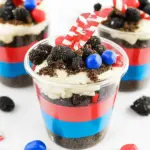
Red, White and Blue Dirt Cups
- Total Time: 0 hours
- Yield: Serves approximately 8 cups 1x
Description
Introducing the delightful Red, White and Blue Dirt Cups—an easy, no-bake dessert that captures the essence of summer celebrations! Perfect for the 4th of July or any festive gathering, these colorful cups feature layers of creamy cheesecake pudding, crushed Oreos, and playful gummy worms. With their vibrant hues and whimsical presentation, they’re sure to be a hit with both kids and adults alike. Best of all, this fun treat takes just minutes to prepare, making it an ideal choice for last-minute desserts. Whether you’re hosting a barbecue or enjoying a picnic, these dirt cups are a delicious way to celebrate in style!
Ingredients
- 2 boxes cheesecake pudding (3.4 ounces each)
- 4 cups milk
- 19 Oreo cookies (crushed)
- ¼ teaspoon red gel food dye
- ¼ teaspoon blue gel food dye
- 8 red and blue gummy worms
Instructions
- In a large mixing bowl, combine both boxes of pudding with milk. Whisk until thickened.
- Divide pudding into two bowls: color one with red dye and the other with blue.
- Layer crushed Oreos in clear plastic cups followed by blue pudding, more Oreos, white pudding, and finally red pudding.
- Top with crushed Oreos and garnish with gummy worms before serving.
- Prep Time: 10 minutes
- Cook Time: None
- Category: Dessert
- Method: No-Bake
- Cuisine: American
Nutrition
- Serving Size: 1 cup (150g)
- Calories: 300
- Sugar: 25g
- Sodium: 220mg
- Fat: 15g
- Saturated Fat: 7g
- Unsaturated Fat: 6g
- Trans Fat: 0g
- Carbohydrates: 38g
- Fiber: 1g
- Protein: 4g
- Cholesterol: 20mg