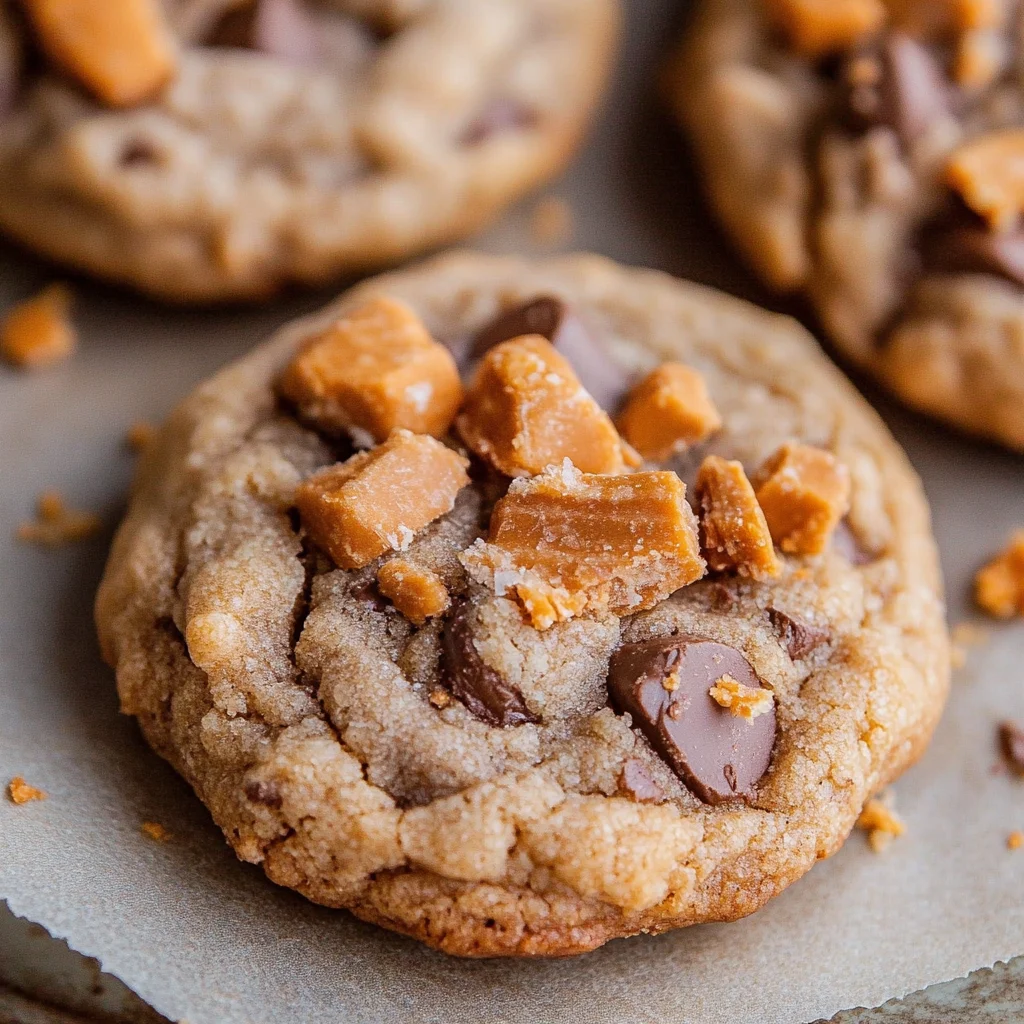
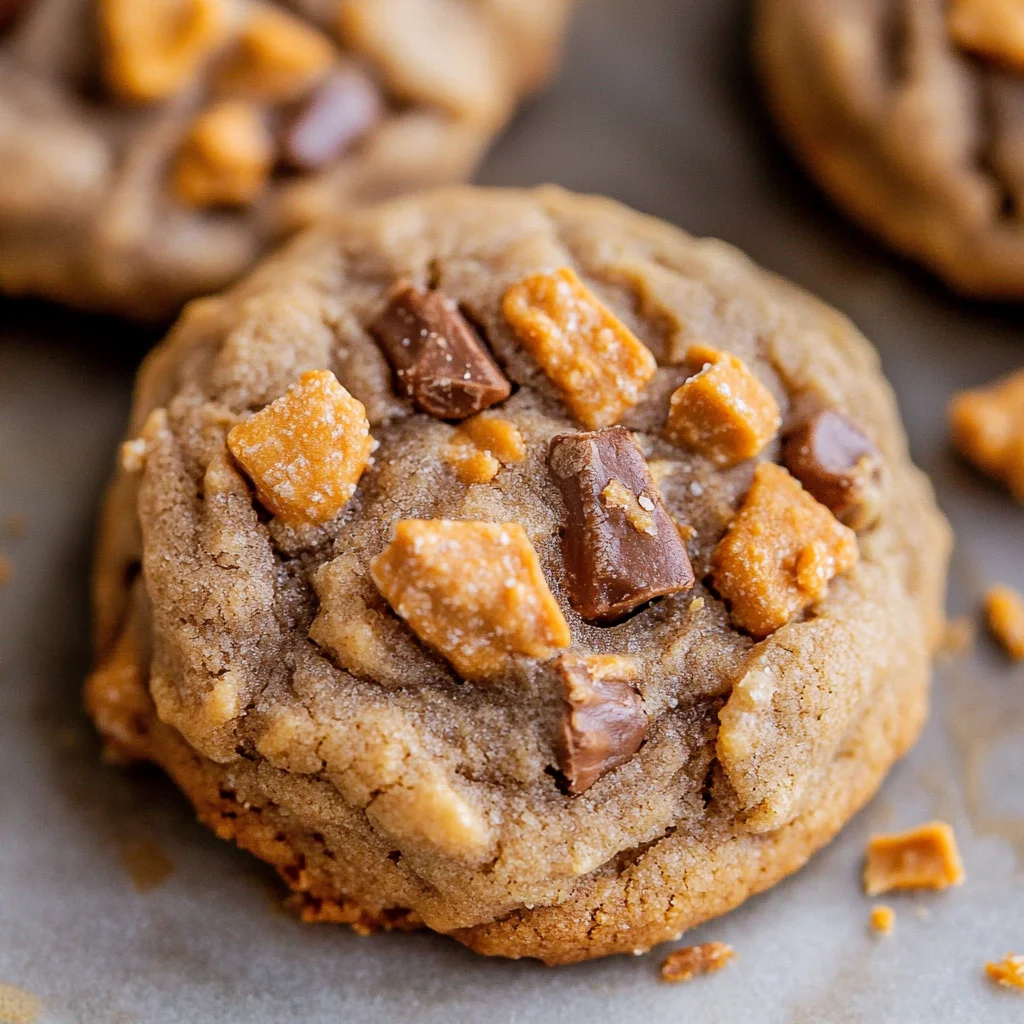
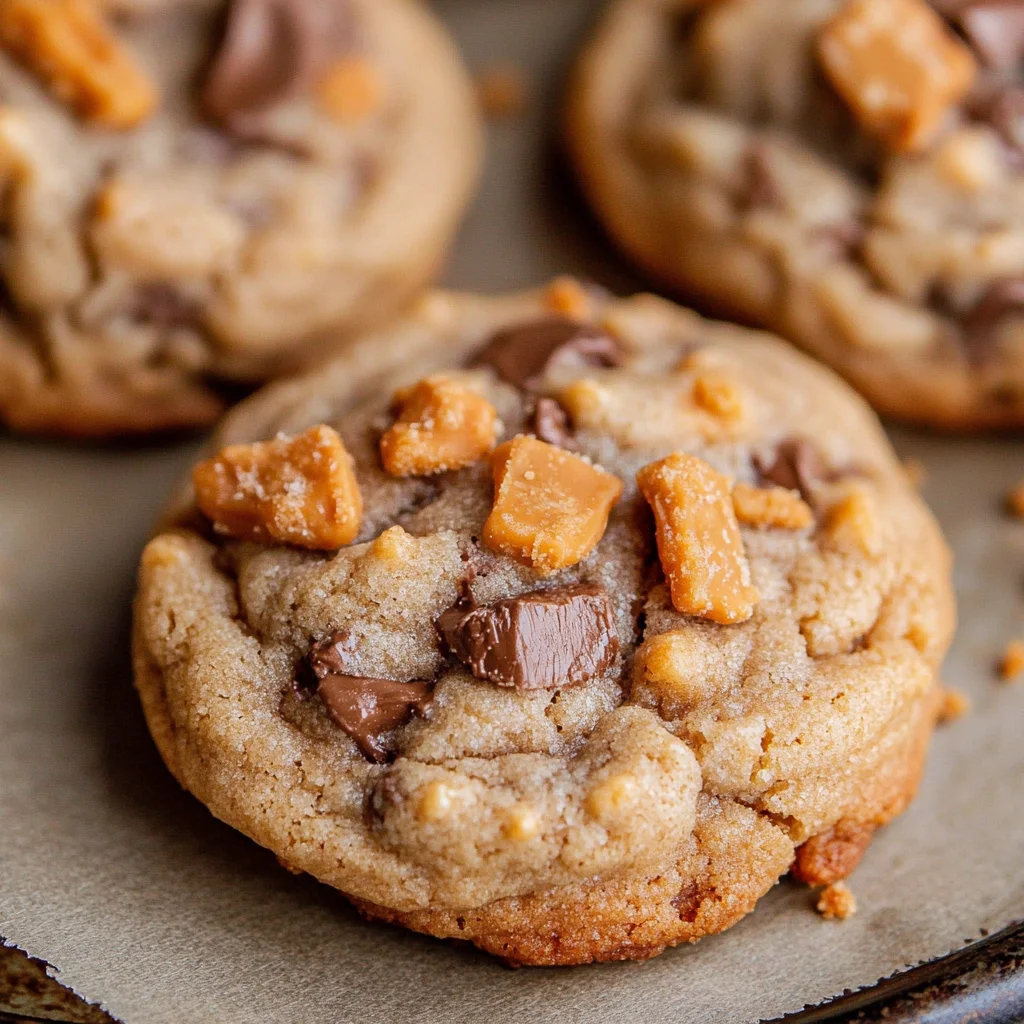
These Peanut Butter Butterfinger Cookies are unreal! I thought peanut butter cookies couldn’t get any better until I added chopped Butterfinger bits. This delightful twist transforms a classic cookie into a treat that’s soft, thick, and loaded with crispety, crunchety peanut-buttery flavors. Perfect for any occasion, these cookies are sure to impress friends and family alike!

Jump to:
- Why You’ll Love This Recipe
- Tools and Preparation
- Essential Tools and Equipment
- Importance of Each Tool
- Ingredients
- How to Make Peanut Butter Butterfinger Cookies
- Step 1: Cream the Butters
- Step 2: Add Sugars
- Step 3: Mix in Peanut Butter
- Step 4: Incorporate Egg and Vanilla
- Step 5: Combine Dry Ingredients
- Step 6: Add Butterfinger Bits
- Step 7: Chill the Dough
- Step 8: Preheat Oven
- Step 9: Shape Cookies
- Step 10: Bake
- Step 11: Cool Down
- How to Serve Peanut Butter Butterfinger Cookies
- With a Glass of Milk
- On a Dessert Platter
- With Ice Cream
- As a Gift
- Drizzled with Chocolate
- Paired with Coffee
- How to Perfect Peanut Butter Butterfinger Cookies
- Best Side Dishes for Peanut Butter Butterfinger Cookies
- Common Mistakes to Avoid
- Storage & Reheating Instructions
- Refrigerator Storage
- Freezing Peanut Butter Butterfinger Cookies
- Reheating Peanut Butter Butterfinger Cookies
- Frequently Asked Questions
- How do I make Peanut Butter Butterfinger Cookies gluten-free?
- Can I use other candies instead of Butterfingers?
- How do I know when my cookies are done?
- Can I make these cookies ahead of time?
- What is the best way to store leftover cookies?
- Final Thoughts
- 📖 Recipe Card
Why You’ll Love This Recipe
- Easy to Make: With simple ingredients and straightforward steps, these cookies come together quickly.
- Decadent Flavor: The combination of rich peanut butter and sweet Butterfinger bits creates an irresistible treat.
- Perfect for Sharing: Bake a batch for parties, potlucks, or just to enjoy with loved ones!
- Versatile Treat: Enjoy them fresh out of the oven or save some dough to bake later.
- Freezer Friendly: The dough and baked cookies freeze well, making it easy to satisfy your sweet tooth anytime.
Tools and Preparation
Before you start baking your delicious Peanut Butter Butterfinger Cookies, gather the necessary tools to ensure a smooth process.
Essential Tools and Equipment
- Stand mixer or large mixing bowl
- Measuring cups and spoons
- Baking sheets
- Parchment paper or silicone baking mat
- Cookie scoop (optional)
- Wire rack
Importance of Each Tool
- Stand mixer or large mixing bowl: Ensures thorough mixing of ingredients for even texture.
- Parchment paper or silicone baking mat: Prevents sticking and makes cleanup easier.
- Cookie scoop: Helps create uniform cookie sizes for even baking.
Ingredients
These Peanut Butter Butterfinger Cookies are unreal! I thought Peanut Butter Cookies couldn’t get any better…But then I added chopped up Butterfinger bits and my life changed forever! A delightfully soft and THICK peanut butter cookie with crispety, crunchety, peanut-buttery bits that make it taste like a peanut brittle cookie.
- 3/4 cup butter (softened (1 and 1/2 sticks))
- 1/2 cup granulated sugar
- 1/2 cup brown sugar (packed)
- 1 cup peanut butter (don’t use natural pb)
- 1 large egg
- 1 & 1/2 teaspoons vanilla
- 1 & 1/2 cups all-purpose flour (spooned and leveled)
- 1/2 teaspoon baking soda
- 1/2 teaspoon baking powder
- 1/4 teaspoon kosher salt
- 16 ounces butterfinger (chopped, see note)*
How to Make Peanut Butter Butterfinger Cookies
Step 1: Cream the Butters
In a large bowl or stand mixer, beat 3/4 cup softened butter until it is smooth and creamy. Scrape the sides of the bowl as needed.
Step 2: Add Sugars
Add 1/2 cup granulated sugar and 1/2 cup packed brown sugar. Beat well for about 2 minutes until fluffy.
Step 3: Mix in Peanut Butter
Add in 1 cup of peanut butter. Using Jif is recommended for the best flavor.
Step 4: Incorporate Egg and Vanilla
Mix in 1 large egg and 1 & 1/2 teaspoons vanilla extract until well combined.
Step 5: Combine Dry Ingredients
Add 1 & 1/2 cups all-purpose flour on top of the mixture. Also add in the baking soda, baking powder, and kosher salt. Stir gently to combine without over-mixing.
Step 6: Add Butterfinger Bits
Fold in 16 ounces of chopped Butterfinger until just incorporated. Be careful not to overdo it!
Step 7: Chill the Dough
Cover the bowl with plastic wrap and chill the dough for at least 15 minutes up to an hour.
Step 8: Preheat Oven
Preheat your oven to 350 degrees F. Line two baking sheets with parchment paper or silicone mats.
Step 9: Shape Cookies
Shape the chilled dough into balls about two inches in diameter. Place them on the prepared baking sheets with enough space between each cookie.
Step 10: Bake
Bake at 350 degrees F for about 10 minutes until edges are set but centers are not shiny.
Step 11: Cool Down
Let cookies rest on the pan for at least five minutes before transferring them to a wire rack to cool completely.
Enjoy your homemade Peanut Butter Butterfinger Cookies!
How to Serve Peanut Butter Butterfinger Cookies
These Peanut Butter Butterfinger Cookies are perfect for sharing or enjoying solo. They can be served in various delightful ways to enhance your dessert experience.
With a Glass of Milk
- A classic pairing that complements the rich peanut butter flavor and sweetness of the cookies, making each bite even better.
On a Dessert Platter
- Arrange these cookies on a beautiful platter with other treats like brownies or bars for an inviting dessert spread at any gathering.
With Ice Cream
- Serve warm cookies with a scoop of vanilla or chocolate ice cream on top for an indulgent treat that combines warm and cold textures.
As a Gift
- Package them in a cute box or mason jar to give as gifts during holidays or special occasions. They make thoughtful and delicious presents!
Drizzled with Chocolate
- Melt some chocolate and drizzle it over the cooled cookies for an extra layer of sweetness and visual appeal.
Paired with Coffee
- Enjoy these cookies alongside your favorite coffee blend for a delicious afternoon pick-me-up that balances well with the cookie’s flavors.
How to Perfect Peanut Butter Butterfinger Cookies
Perfecting your Peanut Butter Butterfinger Cookies is all about attention to detail. Here are some tips to ensure they turn out just right.
- Use Softened Butter: Make sure your butter is softened to room temperature for the best texture. This helps create a creamy mixture that’s easy to whip into fluffiness.
- Don’t Overmix: Mix just until ingredients are combined. Overmixing can lead to tough cookies, so stop when you see no dry flour left.
- Chill the Dough: Chilling the dough before baking allows the flavors to meld and results in thicker cookies. Aim for at least 15 minutes but feel free to chill longer!
- Measure Flour Correctly: Spoon flour into your measuring cup rather than scooping directly from the bag. This prevents compacting and ensures you have the right amount, leading to softer cookies.
- Watch Baking Time: Keep an eye on your cookies as they bake. They should look set at the edges but still soft in the middle when you take them out.
- Cool Properly: Allow cookies to cool on the baking sheet for a few minutes before transferring them to a wire rack. This helps them firm up without breaking apart.
Best Side Dishes for Peanut Butter Butterfinger Cookies
While these cookies shine on their own, pairing them with side dishes can elevate your dessert experience further. Here are some ideas:
- Vanilla Ice Cream: A scoop of creamy vanilla ice cream pairs beautifully with warm cookies, creating a delightful contrast in temperature and texture.
- Chocolate Sauce: Drizzling melted chocolate sauce over your cookie adds richness and enhances its decadent flavor profile, making each bite heavenly.
- Fresh Berries: A side of fresh strawberries or raspberries offers a refreshing tartness that balances out the sweetness of the cookies perfectly.
- Whipped Cream: Light, fluffy whipped cream can be served on the side for dipping or topping, adding an airy creaminess that complements rich flavors.
- Milkshake: Blend up a simple milkshake using vanilla ice cream and milk as a fun drink pairing that mirrors classic childhood treats.
- Fruit Salad: A light fruit salad provides a healthier contrast while adding brightness to your dessert table, complementing the richness of Peanut Butter Butterfinger Cookies.
- Coffee or Espresso: For adults, serving coffee or espresso alongside creates an elegant touch that enhances relaxation while enjoying dessert time.
Common Mistakes to Avoid
When making Peanut Butter Butterfinger Cookies, it’s easy to overlook crucial steps. Here are some common mistakes to avoid for the best results.
- Using natural peanut butter: Natural peanut butter can alter the texture and consistency of your cookies. Stick with regular peanut butter brands like Jif or Skippy for a better outcome.
- Overmixing the dough: Overmixing can lead to tough cookies. Mix the ingredients just until combined, and stop when you see some flour still visible.
- Skipping the chilling step: Chilling the dough helps prevent spreading too much during baking. Aim to chill for at least 15 minutes, or even longer if you have time.
- Not measuring flour properly: Improperly measured flour can lead to dry or dense cookies. Use the spoon-and-level method to ensure accurate measurement.
- Ignoring baking times: Every oven is different, so keep an eye on your cookies as they bake. They should be set at the edges but not shiny in the middle.
Storage & Reheating Instructions
Refrigerator Storage
- Store Peanut Butter Butterfinger Cookies in an airtight container for up to 3 days.
- Ensure they are completely cooled before sealing to avoid moisture buildup.
Freezing Peanut Butter Butterfinger Cookies
- Place cookie dough balls in a ziplock bag and freeze for up to 3 months.
- For baked cookies, store them in a sealed container for up to 4 weeks.
Reheating Peanut Butter Butterfinger Cookies
- Oven: Preheat to 350°F and bake for about 5 minutes until warmed through.
- Microwave: Heat on medium power for 10-15 seconds at a time until warm.
- Stovetop: Place a skillet on low heat and warm each cookie for about 1 minute per side.
Frequently Asked Questions
How do I make Peanut Butter Butterfinger Cookies gluten-free?
To make these cookies gluten-free, substitute all-purpose flour with a gluten-free flour blend. Make sure it’s suitable for baking.
Can I use other candies instead of Butterfingers?
Yes! You can replace Butterfingers with other candies like Reese’s Pieces or M&Ms for a different flavor twist while keeping that delicious peanut butter base.
How do I know when my cookies are done?
Your Peanut Butter Butterfinger Cookies are done when the edges are set, and they appear slightly puffy but not shiny in the center.
Can I make these cookies ahead of time?
Absolutely! You can prepare the dough and chill it up to 24 hours before baking. Alternatively, freeze dough balls and bake them fresh later.
What is the best way to store leftover cookies?
Store any leftover cookies in an airtight container at room temperature. They will stay fresh for about three days but can also be frozen for longer storage.
Final Thoughts
These Peanut Butter Butterfinger Cookies are truly a treat that combines delightful flavors and textures. Their thick, soft nature paired with crunchy bits makes them irresistible! Feel free to customize with your favorite candies or nuts. Don’t hesitate—try making them today!
Did You Enjoy Making This Recipe? Please rate this recipe with ⭐⭐⭐⭐⭐ or leave a comment.
📖 Recipe Card
Print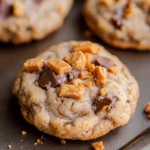
Peanut Butter Butterfinger Cookies
- Total Time: 30 minutes
- Yield: Approximately 24 cookies 1x
Description
Indulge in the ultimate sweet treat with Peanut Butter Butterfinger Cookies! These cookies transform the classic peanut butter flavor into a delightful experience by incorporating crunchy Butterfinger bits. Each bite delivers a perfect balance of soft, thick texture and a satisfying peanut-buttery crunch. They’re not just easy to make but also perfect for sharing at parties, family gatherings, or simply enjoying at home. With their rich flavor and inviting aroma, these cookies are sure to impress everyone.
Ingredients
- 3/4 cup softened butter
- 1/2 cup granulated sugar
- 1/2 cup brown sugar
- 1 cup peanut butter (preferably Jif)
- 1 large egg
- 1 & 1/2 teaspoons vanilla extract
- 1 & 1/2 cups all-purpose flour
- 1/2 teaspoon baking soda
- 1/2 teaspoon baking powder
- 1/4 teaspoon kosher salt
- 16 ounces chopped Butterfinger
Instructions
- In a mixing bowl, cream together the softened butter, granulated sugar, and brown sugar until fluffy.
- Add peanut butter, egg, and vanilla; mix until smooth.
- Gradually incorporate the flour, baking soda, baking powder, and salt until just combined.
- Gently fold in the chopped Butterfinger bits.
- Chill the dough for at least 15 minutes.
- Preheat your oven to 350°F and prepare baking sheets with parchment paper.
- Shape dough into balls and place on baking sheets with space between each cookie.
- Bake for about 10 minutes until edges are set but centers remain soft.
- Allow cookies to cool on the pan before transferring to a wire rack.
- Prep Time: 20 minutes
- Cook Time: 10 minutes
- Category: Dessert
- Method: Baking
- Cuisine: American
Nutrition
- Serving Size: 1 cookie (approximately 40g)
- Calories: 180
- Sugar: 12g
- Sodium: 150mg
- Fat: 9g
- Saturated Fat: 3g
- Unsaturated Fat: 5g
- Trans Fat: 0g
- Carbohydrates: 24g
- Fiber: 1g
- Protein: 3g
- Cholesterol: 10mg