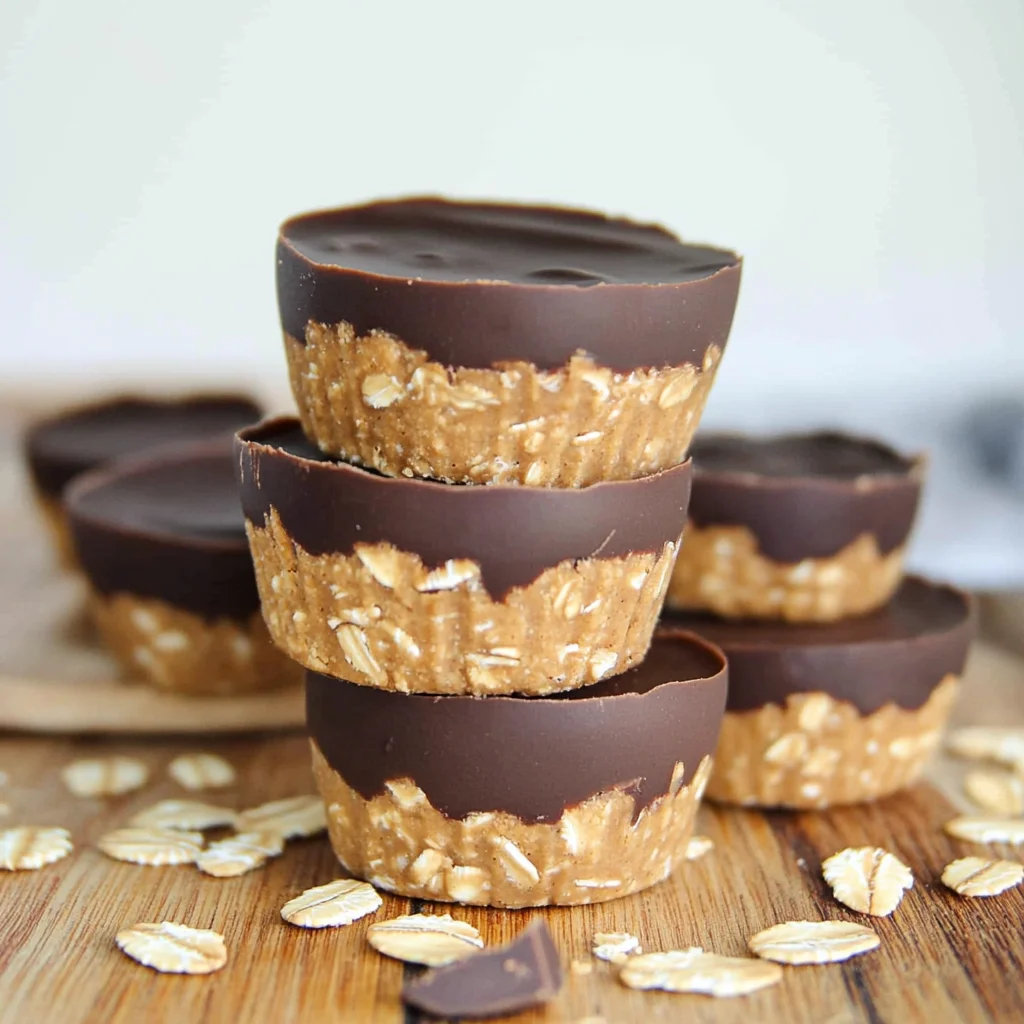
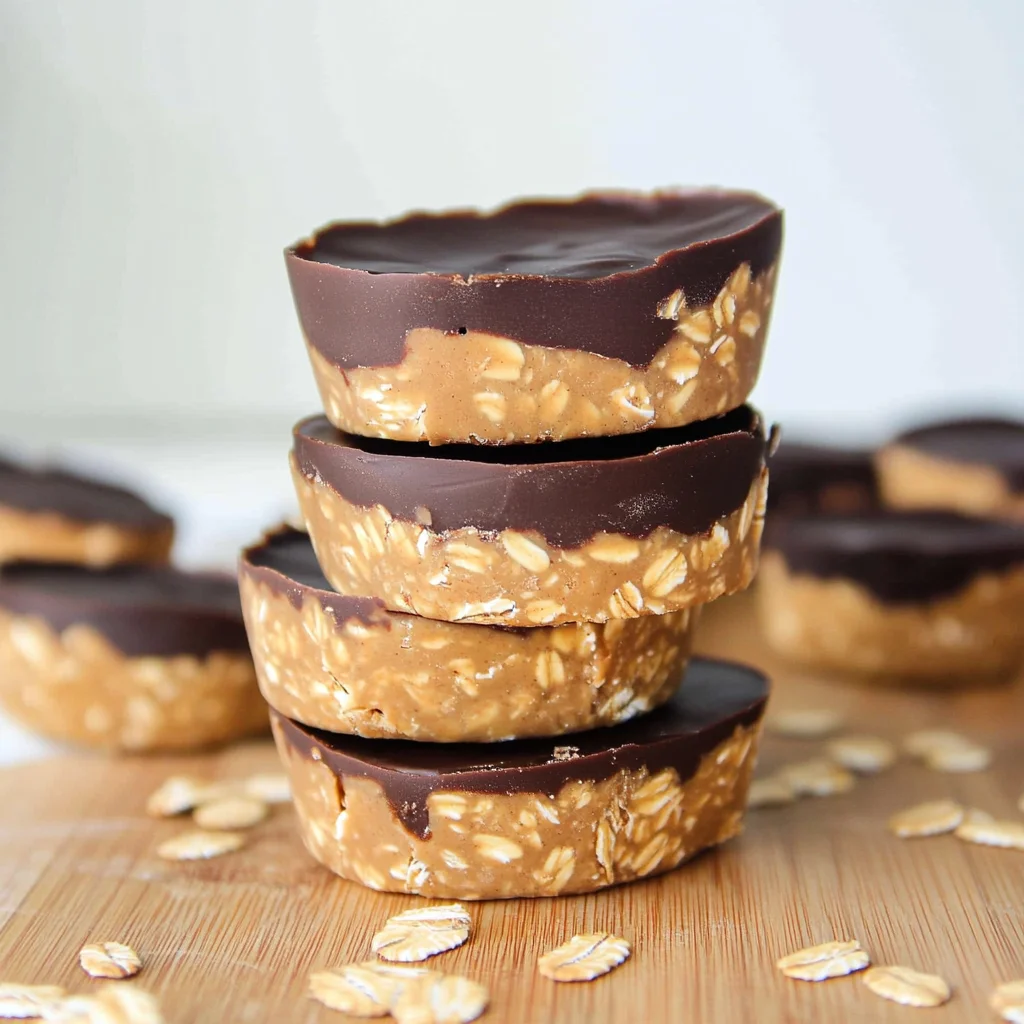
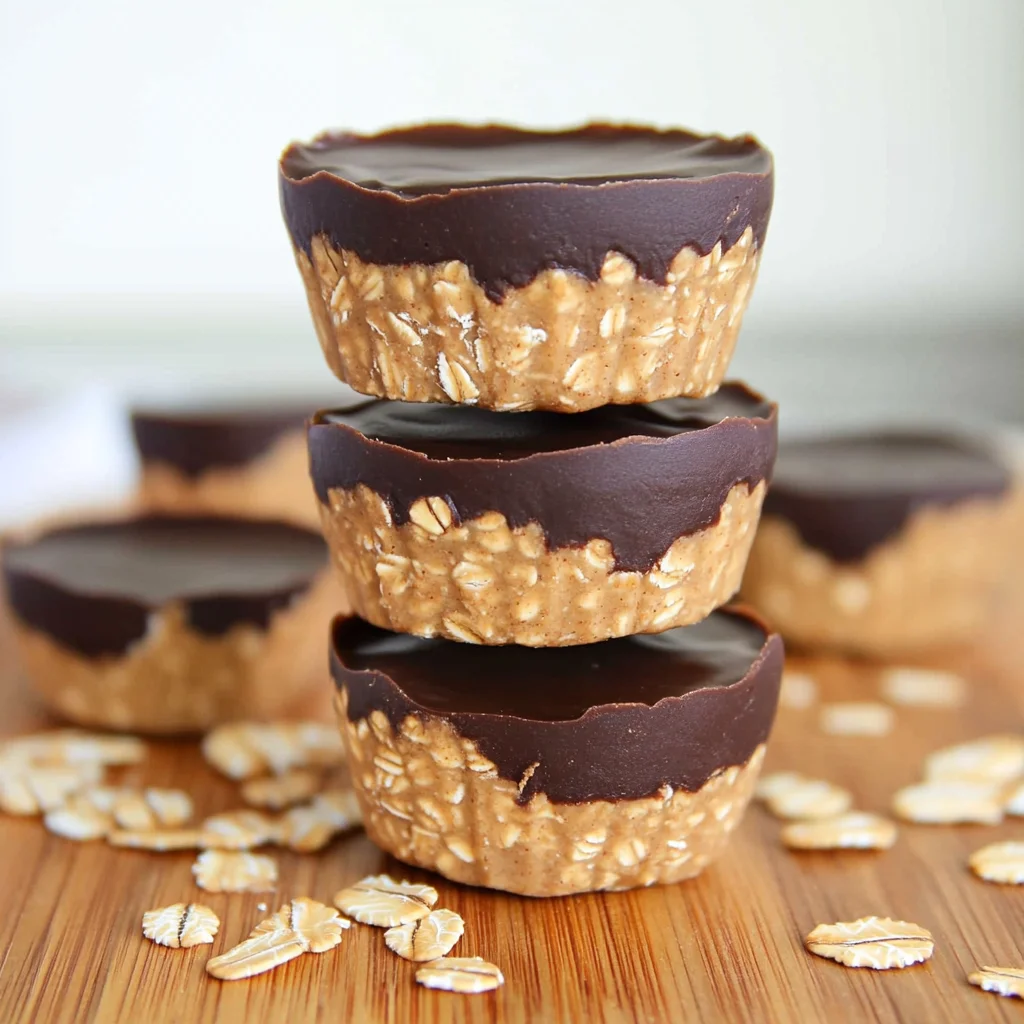
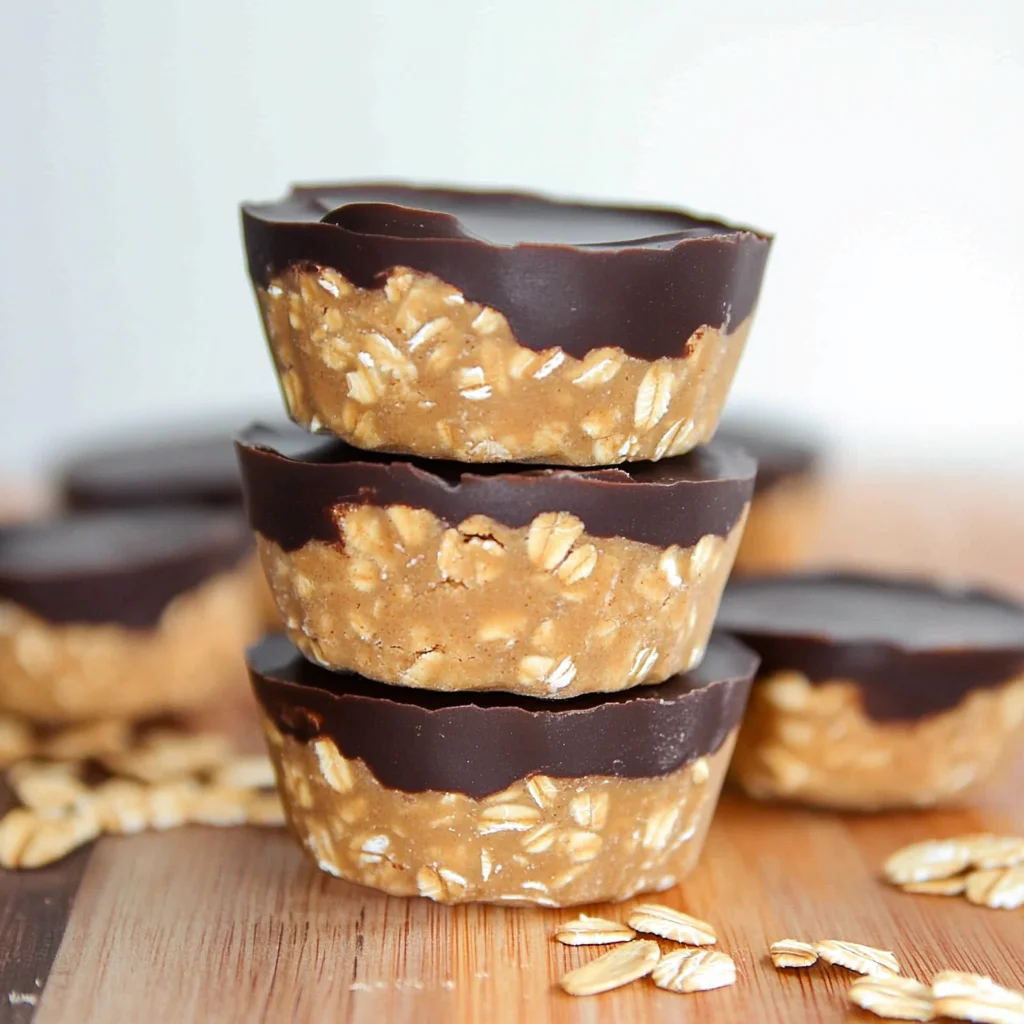
A creamy and delicious treat, No Bake Peanut Butter Oat Cups are perfect for satisfying your sweet tooth without turning on the oven. These tasty cups combine the rich flavor of peanut butter with a luscious chocolate topping, making them an ideal snack for kids and adults alike. Whether you’re hosting a party, looking for a quick dessert option, or simply treating yourself, these oat cups are versatile enough to fit any occasion.
Jump to:
- Why You’ll Love This Recipe
- Tools and Preparation
- Essential Tools and Equipment
- Importance of Each Tool
- Ingredients
- For Garnish
- How to Make No Bake Peanut Butter Oat Cups
- Step 1: Melt Peanut Butter and Maple Syrup
- Step 2: Mix in Oat Flour
- Step 3: Prepare Muffin Pan
- Step 4: Fill Muffin Pan
- Step 5: Melt Chocolate Topping
- Step 6: Add Chocolate Layer
- Step 7: Chill and Store
- How to Serve No Bake Peanut Butter Oat Cups
- As a Quick Snack
- With Fresh Fruit
- For Kids’ Lunchboxes
- Dessert Platter
- How to Perfect No Bake Peanut Butter Oat Cups
- Best Side Dishes for No Bake Peanut Butter Oat Cups
- Common Mistakes to Avoid
- Refrigerator Storage
- Freezing No Bake Peanut Butter Oat Cups
- Reheating No Bake Peanut Butter Oat Cups
- Frequently Asked Questions
- Can I use other nut butters instead of peanut butter?
- How do I make gluten-free No Bake Peanut Butter Oat Cups?
- Can I add toppings or mix-ins?
- How can I customize my No Bake Peanut Butter Oat Cups?
- Final Thoughts
- 📖 Recipe Card
Why You’ll Love This Recipe
- Quick and Easy: This recipe takes only 10 minutes to prepare, making it a great last-minute dessert.
- Healthy Ingredients: Packed with peanut butter and oats, these cups offer a nutritious alternative to traditional sweets.
- Customizable: You can add ingredients like pumpkin puree or toppings such as sprinkles for added flavor and fun.
- Family-Friendly: Kids will love helping to make these treats, and they’ll enjoy eating them even more!
- No Baking Required: This recipe is perfect for hot days when you don’t want to heat up the kitchen.
Tools and Preparation
Before you start making your No Bake Peanut Butter Oat Cups, it’s essential to gather all necessary tools. Having everything ready will streamline your cooking process.
Essential Tools and Equipment
- Microwave-safe bowl
- Silicone muffin pan or cupcake liners
- Mixing spoon
- Food processor (for oat flour)
- Small microwave-safe bowl
Importance of Each Tool
- Microwave-safe bowl: Ideal for melting peanut butter and maple syrup quickly without burning.
- Silicone muffin pan: Makes removing the cups easy and prevents sticking, ensuring a perfect shape.
- Food processor: Necessary for finely grinding rolled oats into oat flour, which creates the right texture.
Ingredients
A creamy peanut butter oat layer topped with melted chocolate makes this treat irresistible. Here are the ingredients you’ll need:
- 1.5 cups peanut butter
- 1.5 cups oat flour (Rolled oats processed finely in a food processor)
- 1/4 cup maple syrup
- 1 cup chocolate chips
- 1 tsp coconut oil (optional)
For Garnish
- 2 tablespoons fresh parsley, finely chopped
How to Make No Bake Peanut Butter Oat Cups
Step 1: Melt Peanut Butter and Maple Syrup
Add your peanut butter and maple syrup to a medium-sized microwave-safe bowl. Microwave for 40-60 seconds until warm. Stir thoroughly until the mixture is completely combined.
Step 2: Mix in Oat Flour
Slowly add the oat flour to the bowl and mix well. It may take some effort! The mixture should be thick but moldable. If it appears too dry, consider adding more maple syrup or peanut butter gradually.
Step 3: Prepare Muffin Pan
Line a muffin pan with cupcake liners or use a silicone muffin pan for easy release. Note that removing from traditional pans may be challenging without liners.
Step 4: Fill Muffin Pan
Scoop the peanut butter oat mixture evenly into each muffin hole and press down firmly with your fingers to compact the mixture.
Step 5: Melt Chocolate Topping
In a small microwave-safe bowl, combine chocolate chips and coconut oil. Heat in 30-second increments until melted, stirring in between until smooth.
Step 6: Add Chocolate Layer
Pour melted chocolate over each filled muffin hole. Smooth the top using the back of a spoon. You can also add optional toppings such as flaky salt or sprinkles before it hardens.
Step 7: Chill and Store
Refrigerate for 2-3 hours until completely set. Carefully remove each cup from the pan or liners. Store in an airtight container in the fridge for up to five days for optimal freshness.
How to Serve No Bake Peanut Butter Oat Cups
No Bake Peanut Butter Oat Cups are a delightful treat that can be enjoyed in various ways. Here are some creative serving suggestions that will enhance your snacking experience.
As a Quick Snack
- On-the-go: Perfect for busy days, grab a cup as a quick energy boost.
- Post-workout: Ideal for replenishing energy after exercise, these cups provide protein and healthy fats.
With Fresh Fruit
- Banana slices: Top each cup with banana slices for added sweetness and nutrition.
- Berries: Pair with strawberries or blueberries for a fresh, fruity contrast.
For Kids’ Lunchboxes
- Fun shapes: Use cookie cutters to create fun shapes from the cups before packing them.
- Mini portions: Cut them into smaller pieces to make bite-sized snacks perfect for kids.
Dessert Platter
- Chocolate drizzle: Add an extra layer of melted chocolate on top for a decadent touch.
- Nut toppings: Sprinkle chopped nuts on top for added crunch and flavor.
How to Perfect No Bake Peanut Butter Oat Cups
To ensure your No Bake Peanut Butter Oat Cups turn out perfectly every time, consider the following helpful tips.
- Use fresh ingredients: Make sure your peanut butter and maple syrup are fresh for the best flavor.
- Adjust sweetness: Feel free to modify the amount of maple syrup based on your taste preference.
- Experiment with flavors: Try adding vanilla extract or cinnamon for an extra flavor boost.
- Check consistency: The mixture should be thick yet moldable; adjust with more peanut butter or oat flour if necessary.
- Keep cool: Refrigerate the cups immediately after making to ensure they set properly.
- Store properly: Use an airtight container in the fridge to maintain freshness and prevent drying out.
Best Side Dishes for No Bake Peanut Butter Oat Cups
Pairing side dishes with No Bake Peanut Butter Oat Cups can create a well-rounded snack time or dessert experience. Here are some delightful options to consider.
- Greek yogurt: A creamy side that complements the peanut butter flavor while adding protein and probiotics.
- Apple slices: Crisp apples add a refreshing crunch that contrasts beautifully with the creamy oat cups.
- Carrot sticks: Healthy and crunchy, these offer a nutritious balance alongside the sweet treats.
- Celery sticks with cream cheese: This classic combo provides a savory element that pairs well with the sweetness of the cups.
- Rice cakes: Light and crispy, rice cakes can serve as a base topped with additional nut butter for extra satisfaction.
- Trail mix: A mix of nuts, seeds, and dried fruit adds variety in texture and flavor, enhancing your snack experience.
Common Mistakes to Avoid
Making No Bake Peanut Butter Oat Cups can be simple, but there are common mistakes that can affect the final product. Here are some pitfalls to watch out for:
- Using Too Much Oat Flour: Adding excessive oat flour can lead to a dry mixture. Use the recommended amount and adjust only if necessary.
- Skipping the Microwave Step: Forgetting to microwave the peanut butter and maple syrup can make it hard to mix. Always warm these ingredients for better consistency.
- Not Pressing Down Firmly: If you don’t press down the mixture in the muffin pan, the cups may crumble when removed. Be sure to pack it tightly for stability.
- Overheating Chocolate: Melting chocolate too quickly can cause it to seize or burn. Heat in short increments and stir frequently for a smooth finish.
- Neglecting Storage Instructions: Improper storage can lead to spoilage. Store them in an airtight container in the refrigerator for freshness.
Refrigerator Storage
- Store No Bake Peanut Butter Oat Cups in an airtight container.
- They stay fresh for up to 5 days in the refrigerator.
Freezing No Bake Peanut Butter Oat Cups
- Place cups in a freezer-safe container.
- They can be frozen for up to 3 months.
- Make sure to separate layers with parchment paper to prevent sticking.
Reheating No Bake Peanut Butter Oat Cups
- Oven: Preheat oven to 350°F (175°C) and heat for about 5 minutes.
- Microwave: Warm on low power for 10-15 seconds until slightly soft.
- Stovetop: Place a cup in a non-stick pan over low heat, flipping occasionally until warmed through.
Frequently Asked Questions
Can I use other nut butters instead of peanut butter?
Yes, you can substitute almond butter or cashew butter for a different flavor profile while keeping the same creamy texture.
How do I make gluten-free No Bake Peanut Butter Oat Cups?
To make them gluten-free, ensure that your oat flour is certified gluten-free. This way, everyone can enjoy this treat!
Can I add toppings or mix-ins?
Absolutely! Feel free to add nuts, dried fruit, or seeds into the mixture before pressing it into the muffin pan for added texture and flavor.
How can I customize my No Bake Peanut Butter Oat Cups?
You can switch up sweeteners by using honey or agave syrup instead of maple syrup, or add cocoa powder for a chocolatey twist!
Final Thoughts
These No Bake Peanut Butter Oat Cups are not only delicious but also customizable. You can adjust ingredients according to your taste preferences while still enjoying a healthy treat. Give this recipe a try, and feel free to experiment with your favorite flavors and add-ins!
Did You Enjoy Making This Recipe? Please rate this recipe with ⭐⭐⭐⭐⭐ or leave a comment.
📖 Recipe Card
Print
No Bake Peanut Butter Oat Cups
- Total Time: 10 minutes
- Yield: Approximately 12 servings 1x
Description
No Bake Peanut Butter Oat Cups are a delectable and satisfying treat that requires no baking, making them perfect for any occasion. With a rich blend of creamy peanut butter and a luscious chocolate topping, these cups come together in just minutes. They are not only a delightful snack for adults and kids alike but also offer a healthier alternative to traditional desserts. Whether you need a quick energy boost during your busy day or a sweet indulgence after dinner, these oat cups are sure to please everyone’s palate.
Ingredients
- 1.5 cups peanut butter
- 1.5 cups oat flour (finely processed rolled oats)
- 1/4 cup maple syrup
- 1 cup chocolate chips
- 1 tsp coconut oil (optional)
Instructions
- In a microwave-safe bowl, combine peanut butter and maple syrup. Microwave for 40-60 seconds until warm, then stir until smooth.
- Gradually mix in the oat flour until well combined; the mixture should be thick yet moldable.
- Line a muffin pan with cupcake liners or use a silicone muffin pan. Scoop the mixture into each muffin hole and press down firmly.
- In a small bowl, melt chocolate chips with coconut oil in the microwave, heating in 30-second increments until smooth.
- Pour melted chocolate over each cup, smoothing it out with the back of a spoon if desired.
- Refrigerate for 2-3 hours until set, then carefully remove from the pan.
- Prep Time: 10 minutes
- Cook Time: 0 minutes
- Category: Dessert
- Method: No Bake
- Cuisine: American
Nutrition
- Serving Size: 1 serving
- Calories: 200
- Sugar: 8g
- Sodium: 150mg
- Fat: 12g
- Saturated Fat: 2g
- Unsaturated Fat: 10g
- Trans Fat: 0g
- Carbohydrates: 20g
- Fiber: 3g
- Protein: 6g
- Cholesterol: 0mg
