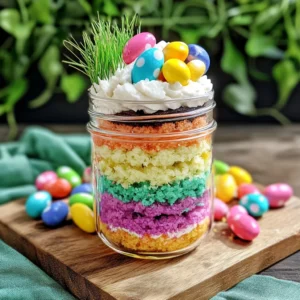
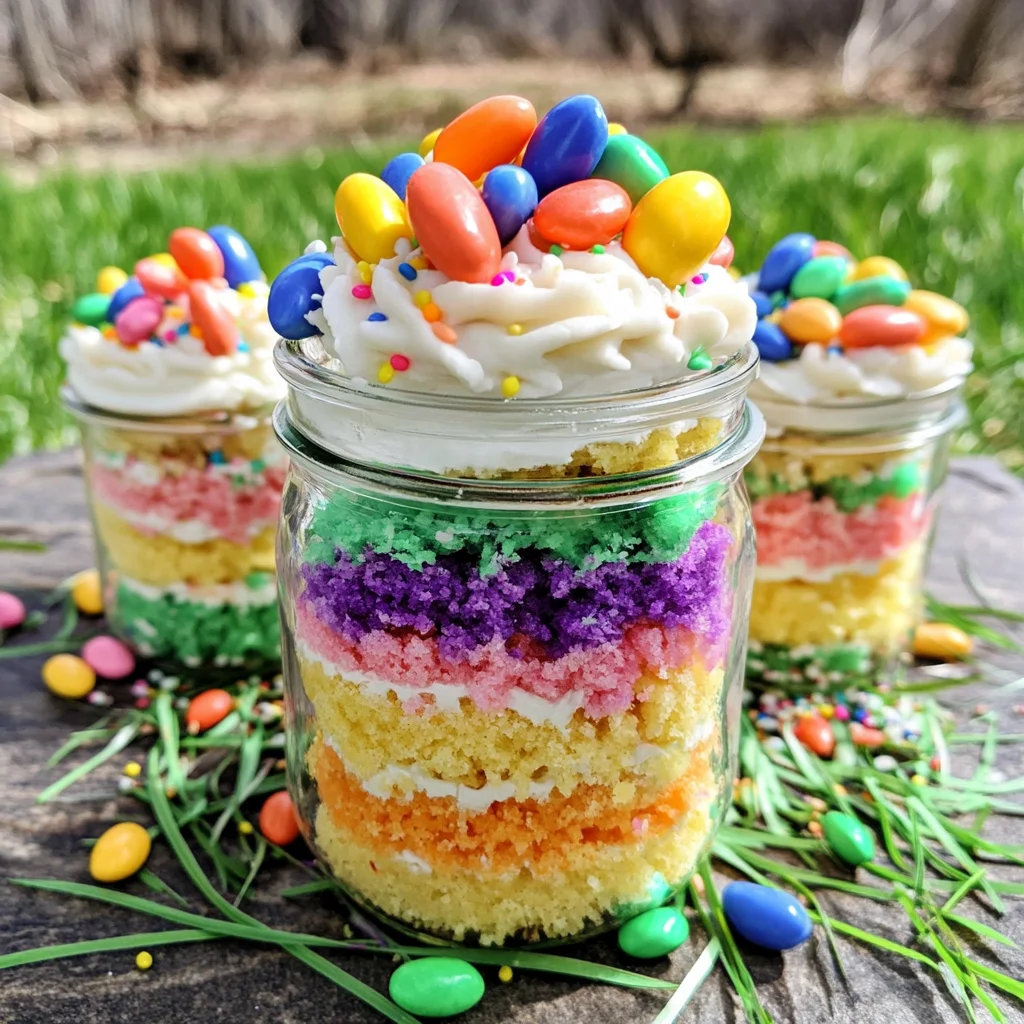
Easter Cake in a Jar is a fun and vibrant dessert that brings a twist to traditional cupcakes. This layered cake in a jar is not only visually appealing but also makes an excellent choice for any gathering, from Easter celebrations to birthday parties. With its colorful layers and delightful decorations, this dessert will surely impress your guests. Plus, it’s easy to prepare ahead of time, letting you focus on enjoying the festivities!

Jump to:
- Why You’ll Love This Recipe
- Tools and Preparation
- Essential Tools and Equipment
- Importance of Each Tool
- Ingredients
- For the Cake Layers
- For the Frosting and Decoration
- For Serving
- How to Make Easter Cake in a Jar
- Step 1: Prepare the Cake Batter
- Step 2: Bake the Cupcakes
- Step 3: Cool and Crumble
- Step 4: Prepare Frosting for Layering
- Step 5: Assemble Your Jars
- Step 6: Decorate Your Jars
- How to Serve Easter Cake in a Jar
- Individual Place Settings
- Dessert Table Display
- Picnic Treats
- Party Favors
- How to Perfect Easter Cake in a Jar
- Best Side Dishes for Easter Cake in a Jar
- Common Mistakes to Avoid
- Storage & Reheating Instructions
- Refrigerator Storage
- Freezing Easter Cake in a Jar
- Reheating Easter Cake in a Jar
- Frequently Asked Questions
- How do I customize my Easter Cake in a Jar?
- Can I make this dessert ahead of time?
- What if I don’t have jars?
- Is there a gluten-free option for Easter Cake in a Jar?
- How do I make my layers more distinct?
- Final Thoughts
- 📖 Recipe Card
Why You’ll Love This Recipe
- Colorful Presentation: Each jar showcases beautiful layers of colored cake and frosting, making it a feast for the eyes.
- Easy to Make: Utilize a simple cake mix and frosting for a quick and hassle-free dessert.
- Customizable: You can switch up the colors or toppings based on your theme or seasonal celebrations.
- Portable Dessert: These individual jars are perfect for sharing or taking to gatherings without the mess.
- Kid-Friendly Fun: Involve kids in the decorating process—it’s a great way to get them excited about baking!
Tools and Preparation
Before you start creating your Easter Cake in a Jar, gather all the necessary tools to make the process smooth and enjoyable.
Essential Tools and Equipment
- Mixing Bowls
- Cupcake Tins
- Plastic Bag (for piping)
- Jars (4-6 oz.)
- Whisk
Importance of Each Tool
- Mixing Bowls: Essential for dividing and coloring your cake batter efficiently.
- Cupcake Tins: Perfectly shape your cupcakes, providing even baking for each layer.
- Plastic Bag: A handy alternative to piping bags, allowing easy application of frosting.
Ingredients
For the Cake Layers
- 1 White Cake Mix, make batter per package directions
- Food Coloring—pink, yellow, teal, purple
For the Frosting and Decoration
- 1 Can White Frosting
- Edible Easter Grass
- Jelly Bean Easter Eggs
- Optional: Easter Sprinkles
For Serving
- 4 Jars—4-6 oz.
How to Make Easter Cake in a Jar
Step 1: Prepare the Cake Batter
- Divide the cake batter into 4 small bowls.
- Add food coloring to each bowl, creating different shades.
Step 2: Bake the Cupcakes
- Scoop each colored batter into cupcake tins.
- Bake according to package directions until golden brown.
Step 3: Cool and Crumble
- Allow cupcakes to cool completely.
- Crumble each color into separate bowls while keeping colors distinct.
Step 4: Prepare Frosting for Layering
- Place frosting in a plastic bag.
- Cut off one corner of the bag to create a piping tool.
Step 5: Assemble Your Jars
- Start with a scoop of purple cake at the bottom of each jar.
- Pipe a thin layer of frosting over it.
- Repeat with other colors (yellow, teal, pink) and frostings until jars are filled.
- Ensure frosting touches jar edges for visible layers.
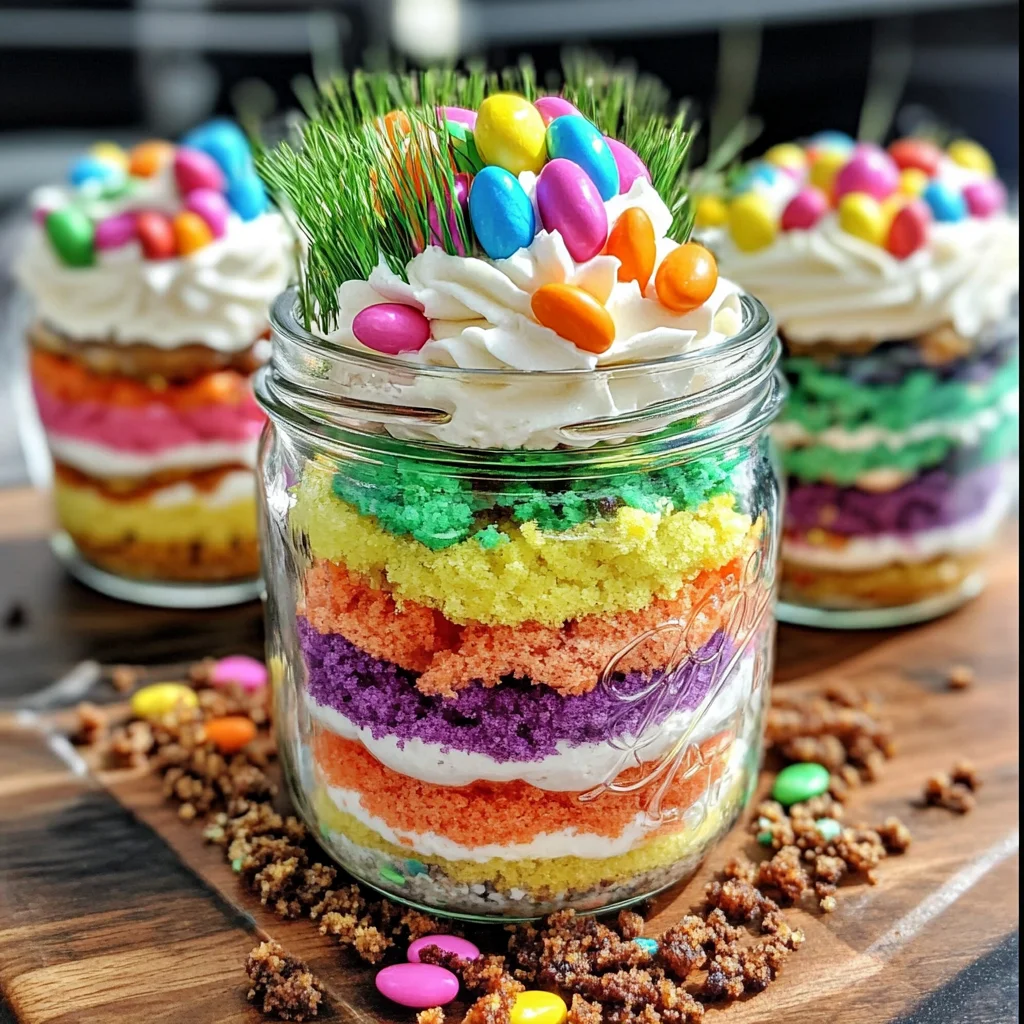
Step 6: Decorate Your Jars
- Top each jar with edible grass and jelly bean eggs resembling nests.
- Optionally sprinkle Easter sprinkles on top for extra flair.
This delightful Easter Cake in a Jar not only satisfies sweet cravings but also serves as an engaging activity during festive gatherings! Enjoy every colorful bite!
How to Serve Easter Cake in a Jar
Easter Cake in a Jar is not just a treat; it’s an experience! This dessert can be enjoyed in various ways, making it perfect for gatherings and family celebrations. Here are some creative serving suggestions to enhance your presentation.
Individual Place Settings
- Create a personalized jar for each guest. Use labels with their names for a charming touch.
Dessert Table Display
- Arrange multiple jars on a beautiful platter or cake stand. Add colorful decorations like flowers or themed napkins for visual appeal.
Picnic Treats
- Pack the jars in a cooler for an outdoor Easter picnic, making it easy for guests to grab and enjoy while soaking up the sun.
Party Favors
- Send guests home with their own jar as a sweet reminder of the celebration. Wrap them in clear cellophane tied with pastel ribbons.
How to Perfect Easter Cake in a Jar
To ensure your Easter Cake in a Jar turns out beautifully, follow these simple tips. They will help you achieve the best results and impress your guests.
- Use Fresh Ingredients: Ensure all ingredients are fresh for optimal flavor and texture.
- Color Vibrantly: When adding food coloring, use enough to create bright, appealing layers without compromising the batter’s consistency.
- Layer Carefully: Take your time when layering cake and frosting to achieve clean edges that showcase the colors.
- Chill Before Serving: Refrigerate the jars before serving to enhance flavors and create a refreshing dessert experience.
- Garnish Creatively: Don’t shy away from adding extra decorations like sprinkles or edible flowers on top for visual flair.
- Serve with Spoons: Provide small spoons with each jar to make it easy for guests to dig into their delicious treat!
Best Side Dishes for Easter Cake in a Jar
Pairing side dishes with your Easter Cake in a Jar can elevate your meal. Here are some delightful options to complement this fun dessert.
- Spring Salad: A fresh mix of greens topped with seasonal vegetables and a light vinaigrette brings brightness to your table.
- Roasted Vegetables: Colorful roasted carrots, asparagus, and bell peppers add warmth and earthiness alongside the sweet dessert.
- Deviled Eggs: Classic deviled eggs offer rich, creamy bites that balance the sweetness of the cake.
- Fruit Platter: A vibrant assortment of seasonal fruits provides a refreshing contrast to the cake in jars.
- Cheese Board: A selection of cheeses paired with crackers offers savory bites that complement the sweet flavors.
- Mini Quiches: These bite-sized treats add protein and variety, making them perfect alongside your dessert spread.
- Pasta Salad: A light pasta salad featuring herbs and veggies can serve as a satisfying side dish option.
- Garlic Breadsticks: These soft, buttery sticks provide a comforting bread element that rounds out your meal nicely.
Common Mistakes to Avoid
When making an Easter Cake in a Jar, it’s important to avoid common pitfalls that can affect the final result.
- Overmixing the batter: This can lead to a dense cake. Mix just until combined for a light and fluffy texture.
- Ignoring cooling time: If you don’t let the cupcakes cool completely, the frosting will melt. Always wait until they’re fully cooled before crumbling.
- Skipping layer visibility: Not ensuring frosting touches the jar edges can hide your beautiful layers. Pipe frosting carefully to maintain visibility of each colorful layer.
- Using the wrong containers: Using jars that are too large may result in too few layers. Stick with 4-6 oz jars for best presentation and portion control.
- Forgetting decorations: Decorations enhance the visual appeal. Don’t skip out on edible grass or jelly beans for that festive touch!
Storage & Reheating Instructions
Refrigerator Storage
- Store in airtight jars to keep them fresh.
- They can last up to 3 days in the refrigerator.
Freezing Easter Cake in a Jar
- To freeze, ensure jars are freezer-safe and tightly sealed.
- They can be frozen for up to 1 month.
Reheating Easter Cake in a Jar
- Oven: Preheat to 350°F (175°C) and warm for about 10 minutes. Remove lids while reheating.
- Microwave: Heat on low power in short intervals (15-20 seconds) until warm.
- Stovetop: Place jars in a pot with water over low heat, warming gradually without boiling.
Frequently Asked Questions
Here are some common questions about making Easter Cake in a Jar:
How do I customize my Easter Cake in a Jar?
You can customize your cake by using different colors or flavors of cake mix and frosting. Try lemon or chocolate flavors for variety!
Can I make this dessert ahead of time?
Absolutely! This dessert is perfect for preparing ahead of time. Just store them in the refrigerator until you’re ready to serve.
What if I don’t have jars?
You can use small cups or dessert bowls instead. Just ensure they’re clear so everyone can see those beautiful layers!
Is there a gluten-free option for Easter Cake in a Jar?
Yes! You can substitute regular cake mix with gluten-free cake mix, ensuring all other ingredients are also gluten-free.
How do I make my layers more distinct?
To achieve distinct layers, be sure to pipe frosting evenly between each layer of cake and avoid over-mixing your batter.
Final Thoughts
Easter Cake in a Jar is not only visually appealing but also versatile, allowing for various flavor combinations and decorations. It’s an excellent choice for gatherings or as a fun activity with kids. Feel free to experiment with colors and toppings to make it uniquely yours!
Did You Enjoy Making This Recipe? Please rate this recipe with ⭐⭐⭐⭐⭐ or leave a comment.
📖 Recipe Card
Print
Easter Cake in a Jar
- Total Time: 40 minutes
- Yield: Serves 4 (4 jars) 1x
Description
Easter Cake in a Jar is a delightful and colorful dessert that adds a playful twist to traditional treats. These layered cakes not only look stunning but are also incredibly simple to make, making them perfect for any celebration from Easter gatherings to birthday parties. Each jar is filled with vibrant cake layers and creamy frosting, creating an eye-catching presentation that will impress your guests. Plus, they can be prepared in advance, allowing you to enjoy the festivities without the stress of last-minute baking. Engage kids in the decorating process for added fun, and serve these portable desserts with ease!
Ingredients
- 1 White Cake Mix
- Food Coloring (pink, yellow, teal, purple)
- 1 Can White Frosting
- Edible Easter Grass
- Jelly Bean Easter Eggs
- Optional: Easter Sprinkles
Instructions
- Prepare the cake batter according to package directions and divide it into four bowls. Add food coloring to each bowl.
- Scoop each colored batter into cupcake tins and bake until golden brown as directed on the package.
- Once cooled, crumble each cupcake color into separate bowls.
- Place frosting in a plastic bag and cut off one corner for easy piping.
- Layer the crumbled cake and frosting in jars starting with purple cake, then frosting, followed by yellow, teal, pink layers, and more frosting.
- Decorate with edible grass and jelly beans on top.
- Prep Time: 20 minutes
- Cook Time: 20 minutes
- Category: Dessert
- Method: Baking
- Cuisine: American
Nutrition
- Serving Size: 1 serving
- Calories: 320
- Sugar: 30g
- Sodium: 180mg
- Fat: 12g
- Saturated Fat: 2g
- Unsaturated Fat: 10g
- Trans Fat: 0g
- Carbohydrates: 49g
- Fiber: 1g
- Protein: 3g
- Cholesterol: 0mg