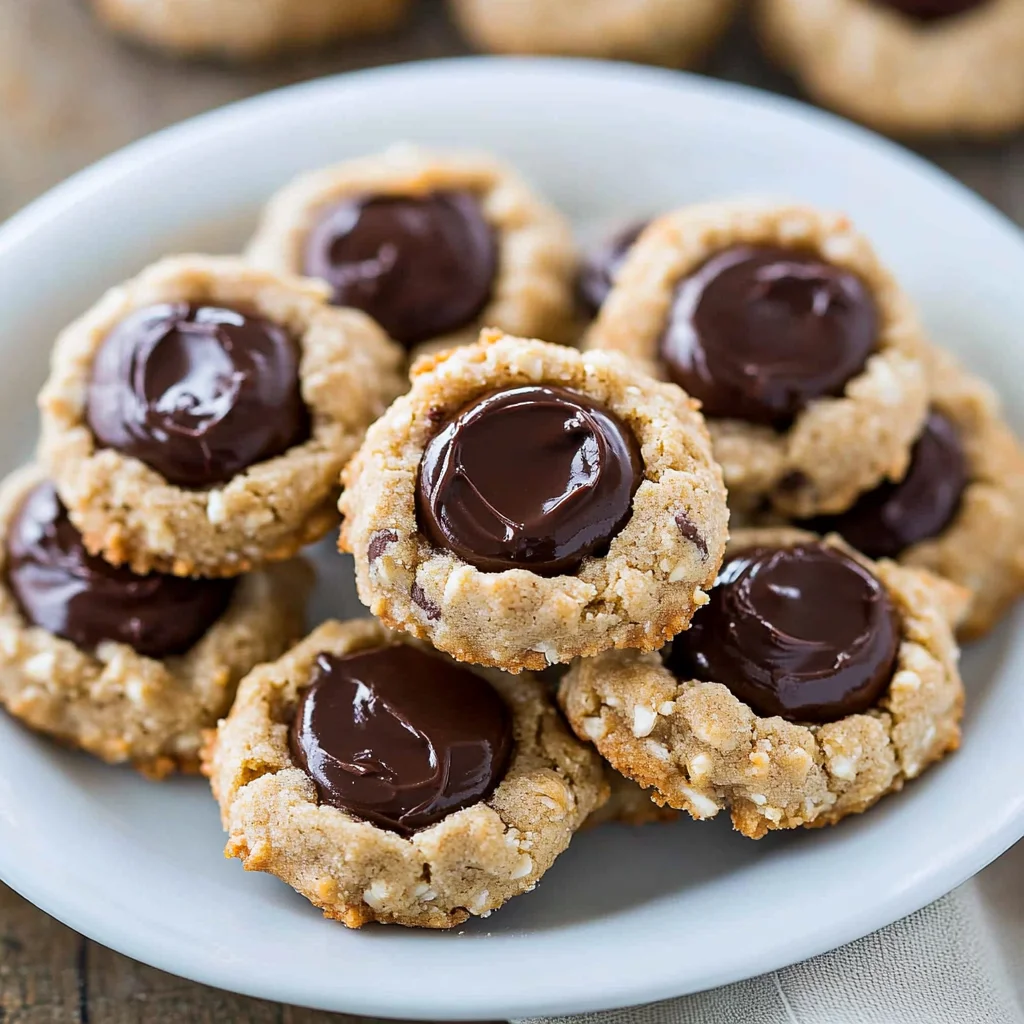
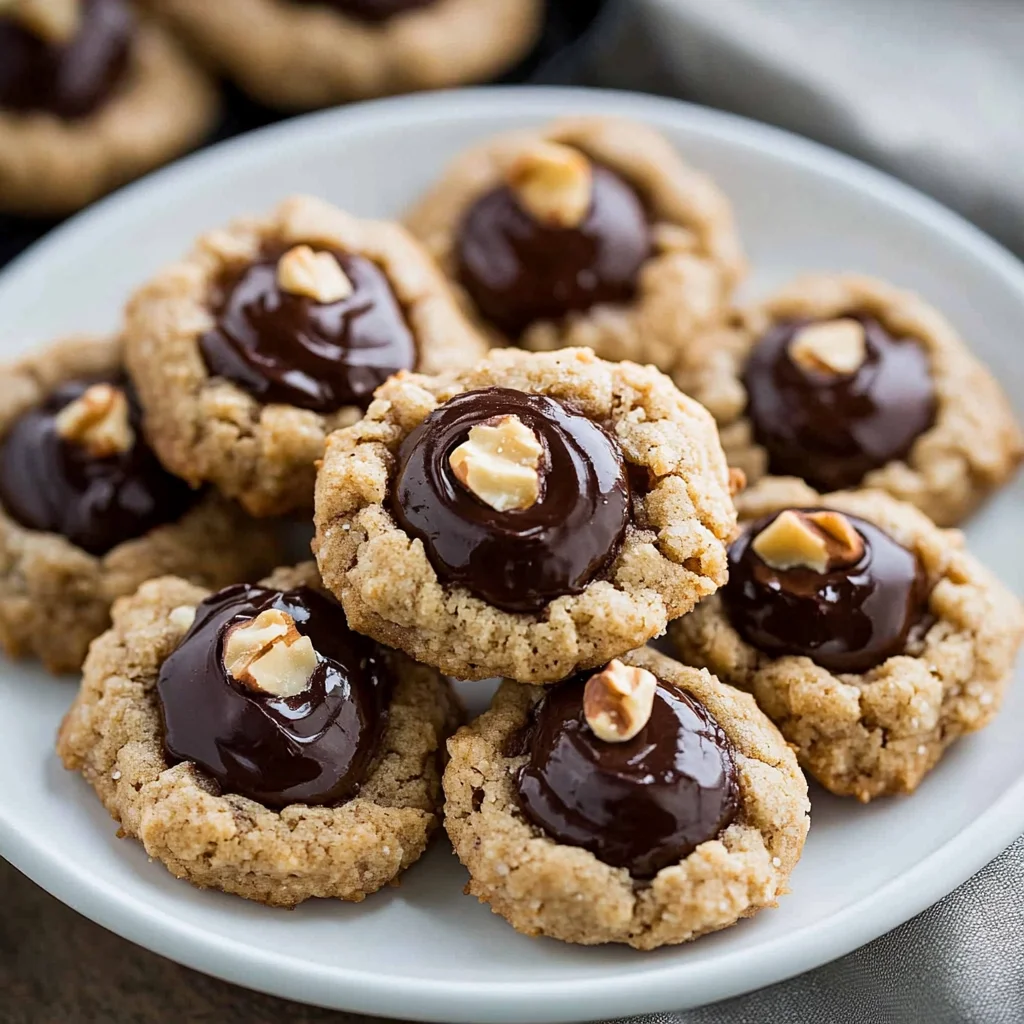
The Chocolate Hazelnut Thumbprint Cookies Recipe is a delightful treat that combines rich chocolate flavor with the creamy goodness of hazelnuts. These cookies are perfect for any occasion, whether it’s a holiday gathering, a cozy afternoon snack, or just to satisfy your sweet tooth. Their unique thumbprint feature filled with chocolate hazelnut spread makes them stand out from traditional cookies.
Jump to:
- Why You’ll Love This Recipe
- Tools and Preparation
- Essential Tools and Equipment
- Importance of Each Tool
- Ingredients
- For the Cookies
- How to Make Chocolate Hazelnut Thumbprint Cookies Recipe
- Step 1: Preheat the Oven
- Step 2: Cream the Butter and Sugar
- Step 3: Combine the Dry Ingredients
- Step 4: Mix Dry Ingredients into Butter Mixture
- Step 5: Shape the Cookies
- Step 6: Create Indentations
- Step 7: Bake the Cookies
- Step 8: Add Chocolate Filling
- Step 9: Cool and Serve
- How to Serve Chocolate Hazelnut Thumbprint Cookies Recipe
- With a Glass of Milk
- As a Dessert Platter
- With Coffee or Tea
- As a Gift
- With Ice Cream
- How to Perfect Chocolate Hazelnut Thumbprint Cookies Recipe
- Best Side Dishes for Chocolate Hazelnut Thumbprint Cookies Recipe
- Common Mistakes to Avoid
- Storage & Reheating Instructions
- Refrigerator Storage
- Freezing Chocolate Hazelnut Thumbprint Cookies Recipe
- Reheating Chocolate Hazelnut Thumbprint Cookies Recipe
- Frequently Asked Questions
- Can I use another type of nut in this Chocolate Hazelnut Thumbprint Cookies Recipe?
- How can I customize my Chocolate Hazelnut Thumbprint Cookies?
- What should I do if my cookie dough is too sticky?
- How long do these cookies last?
- Final Thoughts
- 📖 Recipe Card
Why You’ll Love This Recipe
- Easy to Make: This recipe requires simple ingredients and straightforward steps, making it accessible for bakers of all levels.
- Decadent Flavor: The combination of chocolate and hazelnuts creates a rich taste that is sure to impress friends and family.
- Versatile Treat: Enjoy these cookies as a dessert, snack, or even as gifts during the holidays. They suit various occasions perfectly.
- Customizable Filling: While chocolate hazelnut spread is the classic choice, feel free to experiment with other fillings like fruit jams or peanut butter.
- Impressive Presentation: The thumbprint design not only adds charm but also showcases the luscious filling beautifully.
Tools and Preparation
To make your baking experience smoother, gather the essential tools you’ll need. Having the right equipment can change everything in your kitchen.
Essential Tools and Equipment
- Mixing bowl
- Electric mixer
- Measuring cups and spoons
- Whisk
- Baking sheets
- Parchment paper
- Cookie scoop or spoon
Importance of Each Tool
- Electric mixer: This tool helps achieve a light and fluffy texture when creaming butter and sugar, ensuring a perfect dough.
- Parchment paper: It prevents sticking, making it easy to transfer cookies off the baking sheet without damage.
Ingredients
For the Cookies
- 1 cup (2 sticks) unsalted butter, softened
- 2/3 cup granulated sugar
- 2 teaspoons vanilla extract
- 2 cups all-purpose flour
- 1/2 cup cocoa powder
- 1/2 teaspoon salt
- 1/2 cup hazelnuts, finely chopped (for rolling)
- 1/2 cup chocolate hazelnut spread (such as Nutella)
- Extra whole hazelnuts for garnish (optional)

How to Make Chocolate Hazelnut Thumbprint Cookies Recipe
Step 1: Preheat the Oven
Preheat your oven to 350°F (175°C). Line two baking sheets with parchment paper to prepare for baking.
Step 2: Cream the Butter and Sugar
In a large mixing bowl, use an electric mixer to cream together the unsalted butter and granulated sugar until light and fluffy. Mix in the vanilla extract until well combined.
Step 3: Combine the Dry Ingredients
In a separate bowl, whisk together the all-purpose flour, cocoa powder, and salt. This ensures even distribution of dry ingredients throughout the dough.
Step 4: Mix Dry Ingredients into Butter Mixture
Gradually add the dry ingredients to the butter mixture. Mix until well combined. The dough should be firm and pliable at this stage.
Step 5: Shape the Cookies
Roll the dough into balls, each about 1 inch in diameter. Roll each ball in the finely chopped hazelnuts until coated. Place them on prepared baking sheets, spaced about 2 inches apart.
Step 6: Create Indentations
Use your thumb or the back of a small spoon to press an indentation into the center of each cookie ball carefully.
Step 7: Bake the Cookies
Bake in the preheated oven for about 12-14 minutes. The cookies should be set but not hard when you take them out.
Step 8: Add Chocolate Filling
Once removed from the oven, re-press any puffed-up indentations while still warm. Spoon about a teaspoon of chocolate hazelnut spread into each cookie’s center. Optionally, press a whole hazelnut into each spread for added crunch.
Step 9: Cool and Serve
Allow cookies to cool on baking sheets for about 5 minutes before transferring them to a wire rack to cool completely. Enjoy your delicious homemade treats!
How to Serve Chocolate Hazelnut Thumbprint Cookies Recipe
These delightful cookies can be enjoyed in various ways, making them perfect for any occasion. Whether you’re hosting a gathering or enjoying a quiet evening at home, here are some serving suggestions to enhance your experience.
With a Glass of Milk
- A classic pairing, the creaminess of milk complements the rich chocolate and nutty flavors of the cookies perfectly.
As a Dessert Platter
- Arrange these cookies on a dessert platter alongside other treats for a beautiful presentation. This makes them an excellent choice for parties and celebrations.
With Coffee or Tea
- Enjoy these cookies with a cup of coffee or tea. The warmth of the beverage balances the sweetness and adds an extra layer of comfort.
As a Gift
- These cookies make wonderful homemade gifts. Package them in a decorative box or jar for friends and family to enjoy.
With Ice Cream
- Top these cookies with a scoop of vanilla or hazelnut ice cream for an indulgent treat. The contrast of warm cookie and cold ice cream is irresistible.
How to Perfect Chocolate Hazelnut Thumbprint Cookies Recipe
Achieving the perfect Chocolate Hazelnut Thumbprint Cookies requires some useful tips. Follow these suggestions to elevate your baking game.
- Use Room Temperature Butter: Make sure your butter is softened before creaming it with sugar. This will create a smoother, fluffier dough.
- Don’t Overmix: When combining dry ingredients with the wet mixture, mix just until combined. Overmixing can lead to tough cookies.
- Chill the Dough: If your dough feels too sticky, chill it in the refrigerator for 15-30 minutes before rolling into balls. This helps maintain shape during baking.
- Adjust Baking Time: Keep an eye on your cookies while they bake. Ovens can vary, so check for doneness around the 12-minute mark to prevent overbaking.
- Use Quality Hazelnuts: Freshly chopped hazelnuts will provide better flavor and texture than pre-packaged varieties. Toasting them lightly can enhance their nuttiness even further.
- Experiment with Fillings: While chocolate hazelnut spread is delicious, feel free to try different fillings like fruit preserves or peanut butter for variety.
Best Side Dishes for Chocolate Hazelnut Thumbprint Cookies Recipe
These cookies pair well with various side dishes that complement their rich flavors. Here are some ideas to consider when planning your meal or snack time.
- Fresh Fruit Salad: A mix of seasonal fruits adds freshness and balances the sweetness of the cookies.
- Cheese Platter: Include mild cheeses such as brie or mascarpone that contrast nicely with the rich chocolate flavor.
- Yogurt Parfait: Layer yogurt with granola and berries for a light accompaniment that enhances the overall experience.
- Chocolate Fondue: For chocolate lovers, serve these cookies alongside melted chocolate for dipping.
- Nut Mix: A bowl of assorted nuts provides crunch and complements the hazelnut flavor in the cookies.
- Mini Cheesecakes: Individual cheesecakes add elegance and richness that pairs beautifully with thumbprint cookies.
- Savory Crackers: Include some savory crackers to balance out the sweet flavors from the cookies.
- Coffee Cake: Serve with slices of coffee cake for an inviting brunch option that guests will love.
Common Mistakes to Avoid
Baking can be tricky, especially with recipes like Chocolate Hazelnut Thumbprint Cookies. Here are some common mistakes to watch out for.
- Not Softening Butter Properly: Using cold butter will prevent your cookies from being fluffy. Ensure your butter is softened to room temperature before mixing.
- Skipping the Chilling Step: If you don’t chill the dough, the cookies may spread too much while baking. Allow the dough to rest in the fridge for about 30 minutes if it feels too soft.
- Overbaking Cookies: Baking them for too long can lead to hard cookies instead of soft ones. Keep a close eye on them during the last few minutes of baking.
- Ignoring Measurements: Baking is a science, and precise measurements are crucial. Use proper measuring cups and spoons for accuracy.
- Using Low-Quality Ingredients: The flavor of your cookies relies heavily on ingredient quality. Choose fresh, high-quality cocoa powder and chocolate hazelnut spread for the best results.
Storage & Reheating Instructions
Refrigerator Storage
- Store leftover cookies in an airtight container in the fridge for up to 5 days.
- Place parchment paper between layers to prevent sticking.
Freezing Chocolate Hazelnut Thumbprint Cookies Recipe
- Freeze cookies in an airtight container or freezer bag for up to 3 months.
- Layer parchment paper between cookies if stacking to avoid sticking.
Reheating Chocolate Hazelnut Thumbprint Cookies Recipe
- Oven: Preheat to 350°F (175°C) and heat cookies for about 5-7 minutes until warm.
- Microwave: Heat individual cookies on a microwave-safe plate for about 10-15 seconds.
- Stovetop: Warm in a skillet over low heat for a couple of minutes, covered with a lid.

Frequently Asked Questions
Can I use another type of nut in this Chocolate Hazelnut Thumbprint Cookies Recipe?
You can substitute hazelnuts with walnuts or pecans if you prefer. Just chop them finely and roll your cookie balls accordingly.
How can I customize my Chocolate Hazelnut Thumbprint Cookies?
Feel free to add spices like cinnamon or nutmeg into the dough, or use different flavored spreads like almond or peanut butter instead of chocolate hazelnut spread.
What should I do if my cookie dough is too sticky?
If your dough feels sticky, try chilling it in the refrigerator for 30 minutes. This will help it firm up and make it easier to handle.
How long do these cookies last?
When stored properly, Chocolate Hazelnut Thumbprint Cookies can last up to 5 days in the refrigerator or up to 3 months in the freezer.
Final Thoughts
The Chocolate Hazelnut Thumbprint Cookies Recipe is not only delicious but also versatile. They make a great treat for any occasion and can easily be customized based on your preferences. Try adding different fillings or nuts to make them uniquely yours! Enjoy baking these delightful cookies!
Did You Enjoy Making This Recipe? Please rate this recipe with ⭐⭐⭐⭐⭐ or leave a comment.
📖 Recipe Card
Print
Chocolate Hazelnut Thumbprint Cookies
- Total Time: 34 minutes
- Yield: Approximately 24 cookies 1x
Description
Indulge in the rich flavors of our Chocolate Hazelnut Thumbprint Cookies, a delightful treat that brings together the decadence of chocolate and the nutty goodness of hazelnuts. These cookies are perfect for any occasion—be it a holiday gathering, a cozy afternoon snack, or as a sweet gift for loved ones. The signature thumbprint feature, filled with luscious chocolate hazelnut spread, sets them apart from traditional cookies. With easy-to-follow instructions, even beginner bakers can create these impressive delights that will surely impress family and friends.
Ingredients
- 1 cup unsalted butter (softened)
- 2/3 cup granulated sugar
- 2 teaspoons vanilla extract
- 2 cups all-purpose flour
- 1/2 cup cocoa powder
- 1/2 teaspoon salt
- 1/2 cup finely chopped hazelnuts (for rolling)
- 1/2 cup chocolate hazelnut spread (like Nutella)
- Extra whole hazelnuts (optional for garnish)
Instructions
- Preheat your oven to 350°F (175°C) and line two baking sheets with parchment paper.
- In a mixing bowl, cream together the softened butter and granulated sugar until fluffy; add vanilla extract.
- In another bowl, whisk together flour, cocoa powder, and salt; gradually mix into the butter mixture until combined.
- Roll dough into 1-inch balls and coat in chopped hazelnuts; place on prepared baking sheets.
- Use your thumb to create an indentation in each cookie ball.
- Bake for 12-14 minutes; remove and fill indentations with chocolate hazelnut spread while warm.
- Allow to cool before serving.
- Prep Time: 20 minutes
- Cook Time: 14 minutes
- Category: Dessert
- Method: Baking
- Cuisine: American
Nutrition
- Serving Size: 1 serving
- Calories: 150
- Sugar: 9g
- Sodium: 45mg
- Fat: 8g
- Saturated Fat: 4g
- Unsaturated Fat: 3g
- Trans Fat: 0g
- Carbohydrates: 19g
- Fiber: 1g
- Protein: 2g
- Cholesterol: 20mg